I have recently found myself pulled into the world of 40K thanks to a group of friends and an escalation league at my friendly local game shop. While new to the game, I have been kitbashing and modeling for years, so of course I had to pick the faction where that sort of thing is not just acceptable, but damn near mandatory. Thus I find myself waging into the great green tide of the WAAAGH!!!
As a fresh new Ork player I almost immediately became enamored with the Kult of Speed and decided rather quickly that I needed a hoard of war bikers. Unfortunately, the only official Ork Bikerboss model made is a rather expensive Forgeworld figure. While very cool, he exists just out of my acceptable price range for a single model. So lacking a sufficiently imposing and badass looking figure, I decided to make my own.
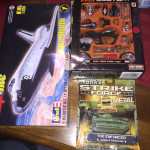
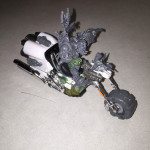
A quick trip to the toy aisle and a local model shop produced a nice stack of parts fodder and a few sheets of plasticard. Breaking down a tank gave me tracks for the rear end; while the back end from space shuttle model kit supplied the power plant and thrusters, and a motorcycle model gave me appropriate exhaust pipes, handlebars, and the front forks. Then I started adding plasticard, and all of those disparate parts gave me a decent initial mock-up.
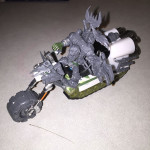
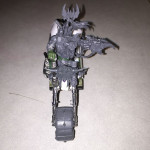
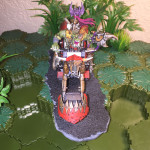
To flesh out the bare frame I’d put together from those various toys, I pulled several bits from an Ork Trukk, specifically a wheel, several fuel tanks, some more exhaust pipes, and the front grill. An Ork Warbike provided the front cowl, and a Deff Dread faceplate served as a front fender while its shootas got side mounted to become the Dakkaguns. As for the boss himself, I cut-up and reposed the Assault on Black Reach Warboss. A fair bit more plasticard and plenty of greenstuff later I had a damn good-looking figure ready for priming and paint. A few work in progress pics provide and idea of the direction I was going, though I wish I’d taken a few more.
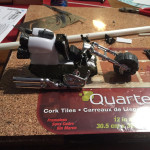
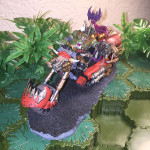
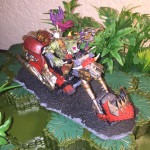
Naturally, I had to go with a red paint job because Da red wunz go fasta! I used plenty of metallic pigments to pick out all the dakka festooned upon the rig, and then I grimed it up with dry brushed rust and a good black wash. I used a mix of citadel and P3 paints on the big guy and did a very simple cork board basing on top of a custom base plate cut from some 3.2mm thick sheet styrene.
Being the customizer I am I plan on building up plenty more ramshackle Ork vehicles in the future. Hopefully I’ll have the peace of mind to take more work in progress pictures to really show off the process.