Archives

All posts for the month July, 2015

I am in the middle of another project but I really wanted to keep my one post a week schedule going, so I thought I would give you all a glimpse at an older project of mine. Before I dove into the world of Orks and 40k, I tested the war game waters with Warmachine. Along with my first miniature painting work, this period also saw my first efforts at a terrain project. Since Warmachine tends to only need a handful of dice, I decided to incorporate a dice tower into its construction.

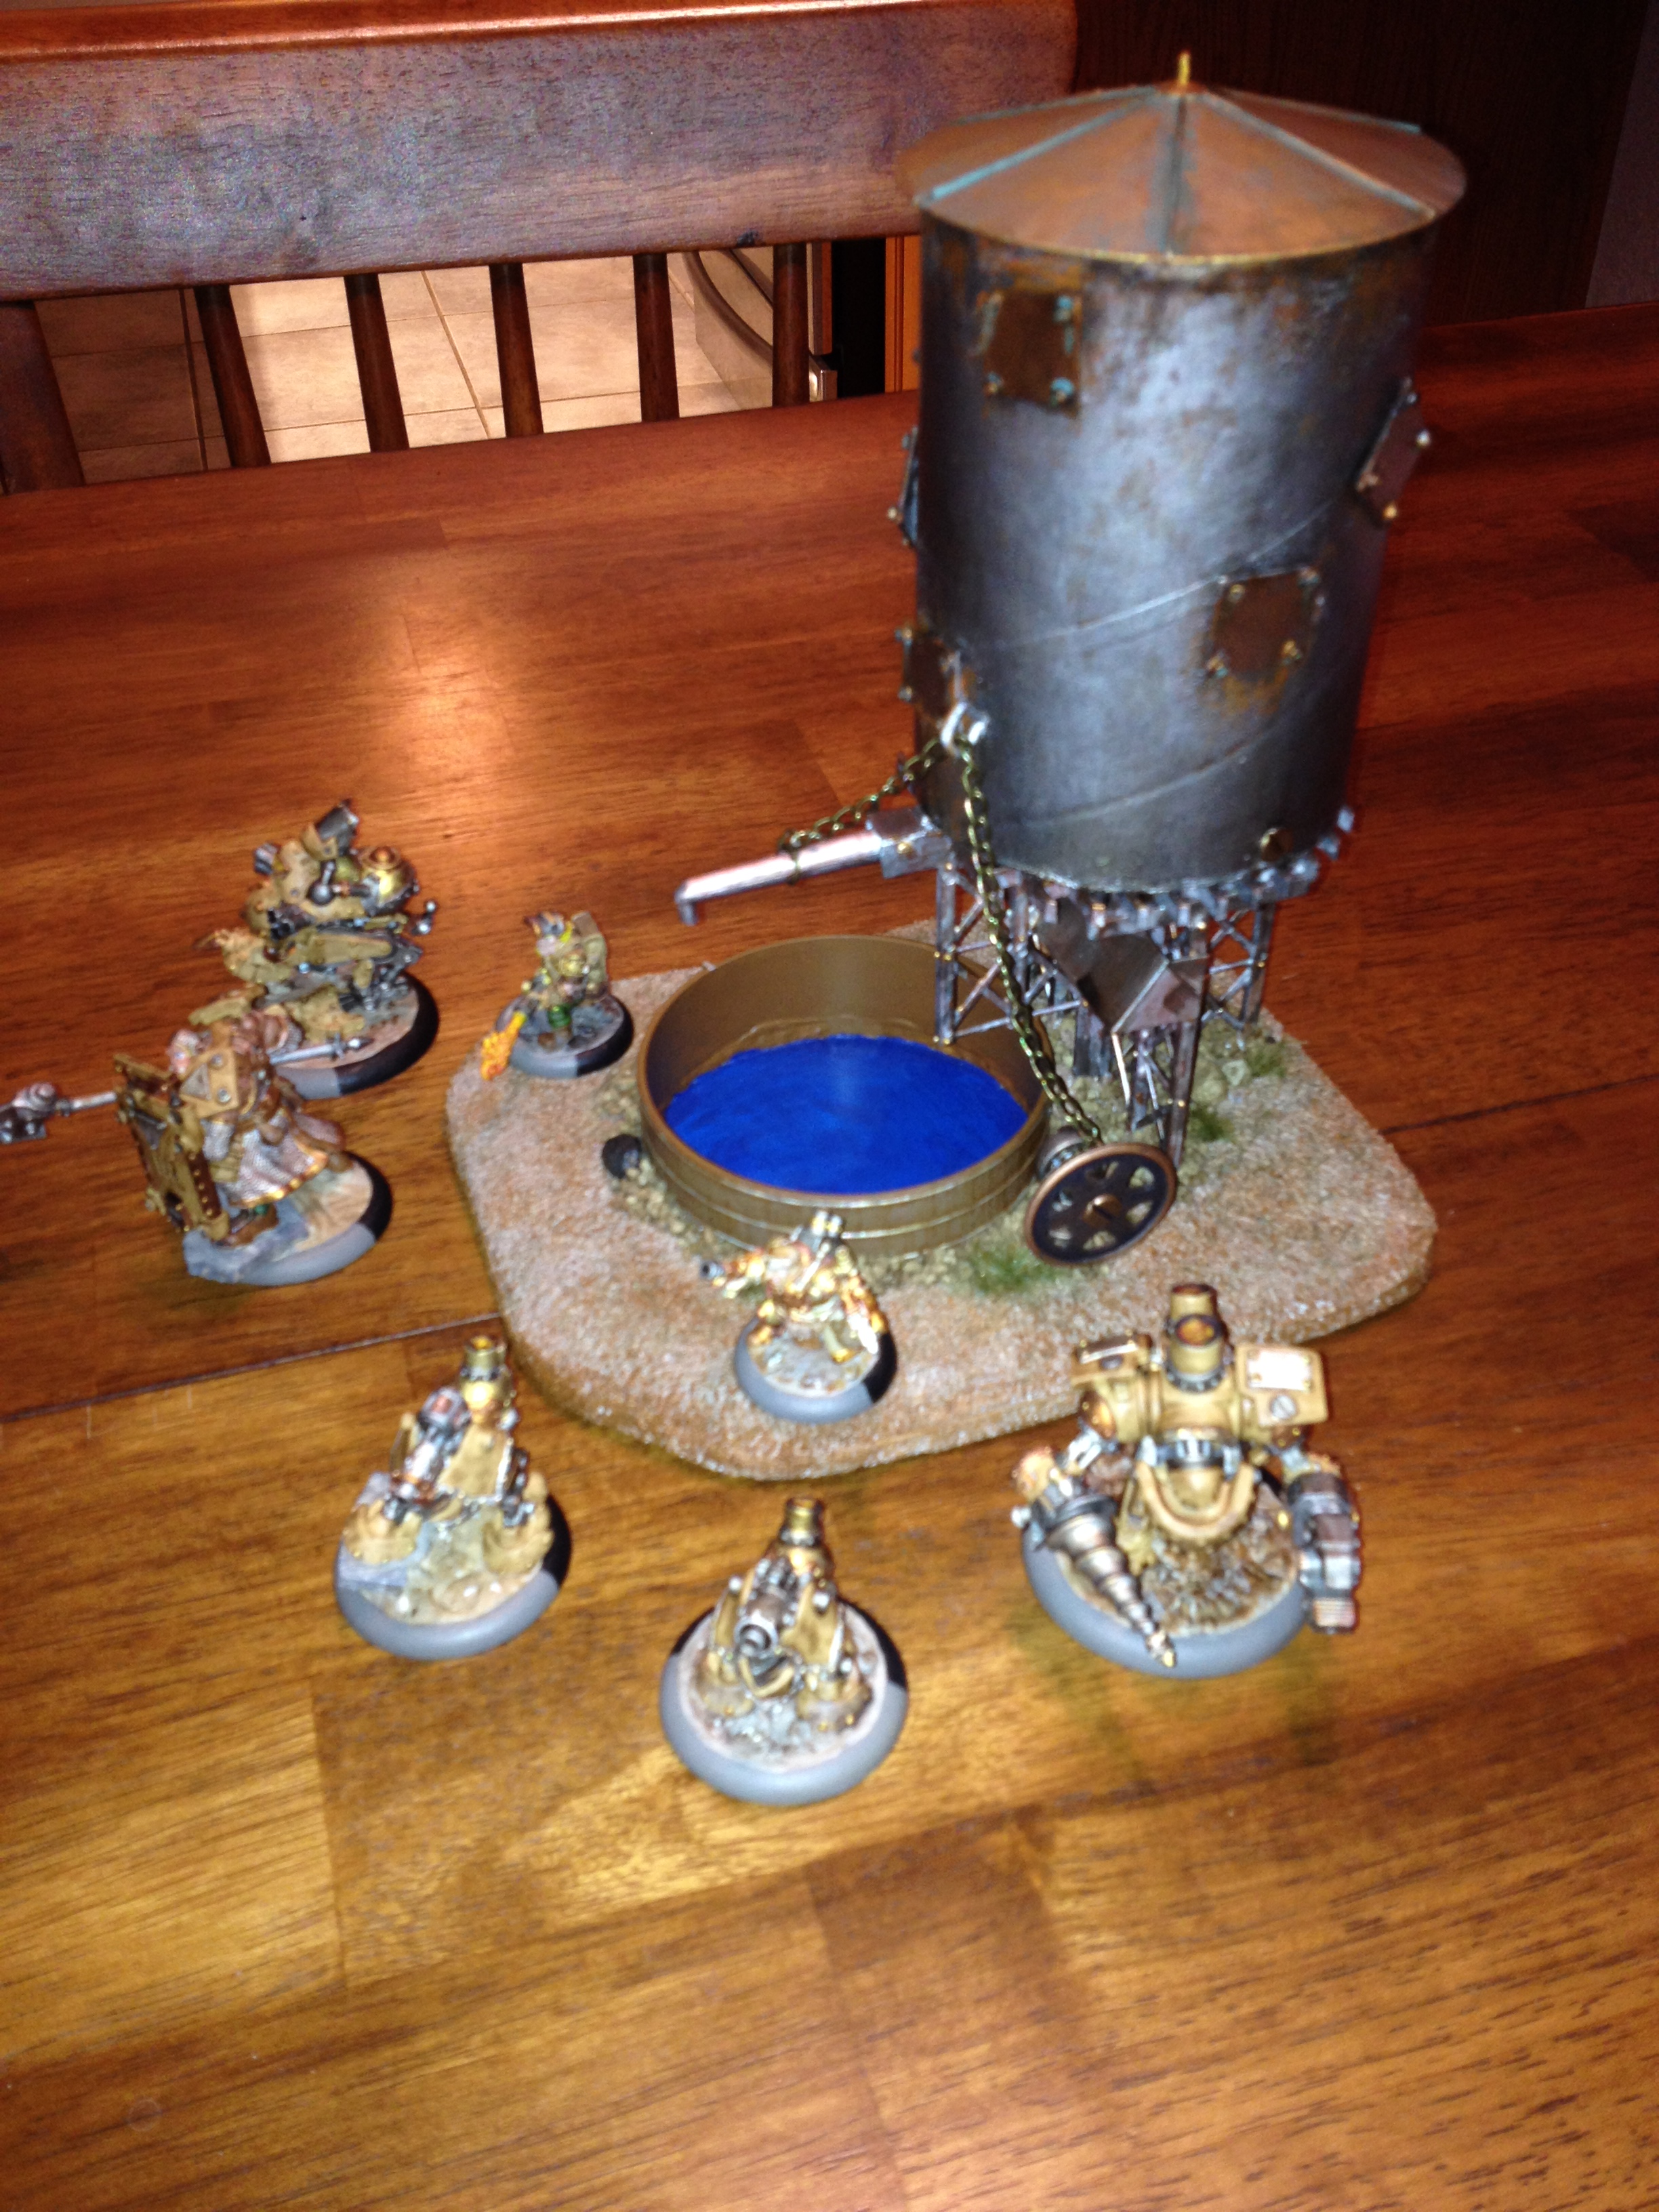
The basic build consisted of a poster tube and parts from a Bachmann Trains O scale water tower kit. Detail elements and the dice tower internals came from plasticard and parts from my bits bin. The final element of any good terrain piece is the base and I built this one before I had really started playing with HDF board. As a result, it is just two layers of corkboard with a piece of plasticard sandwiched between them for structural integrity. This was also necessary to create a watertight seal for another special feature I wanted to try.

watertowerwip

IMG_0600IMG_0609

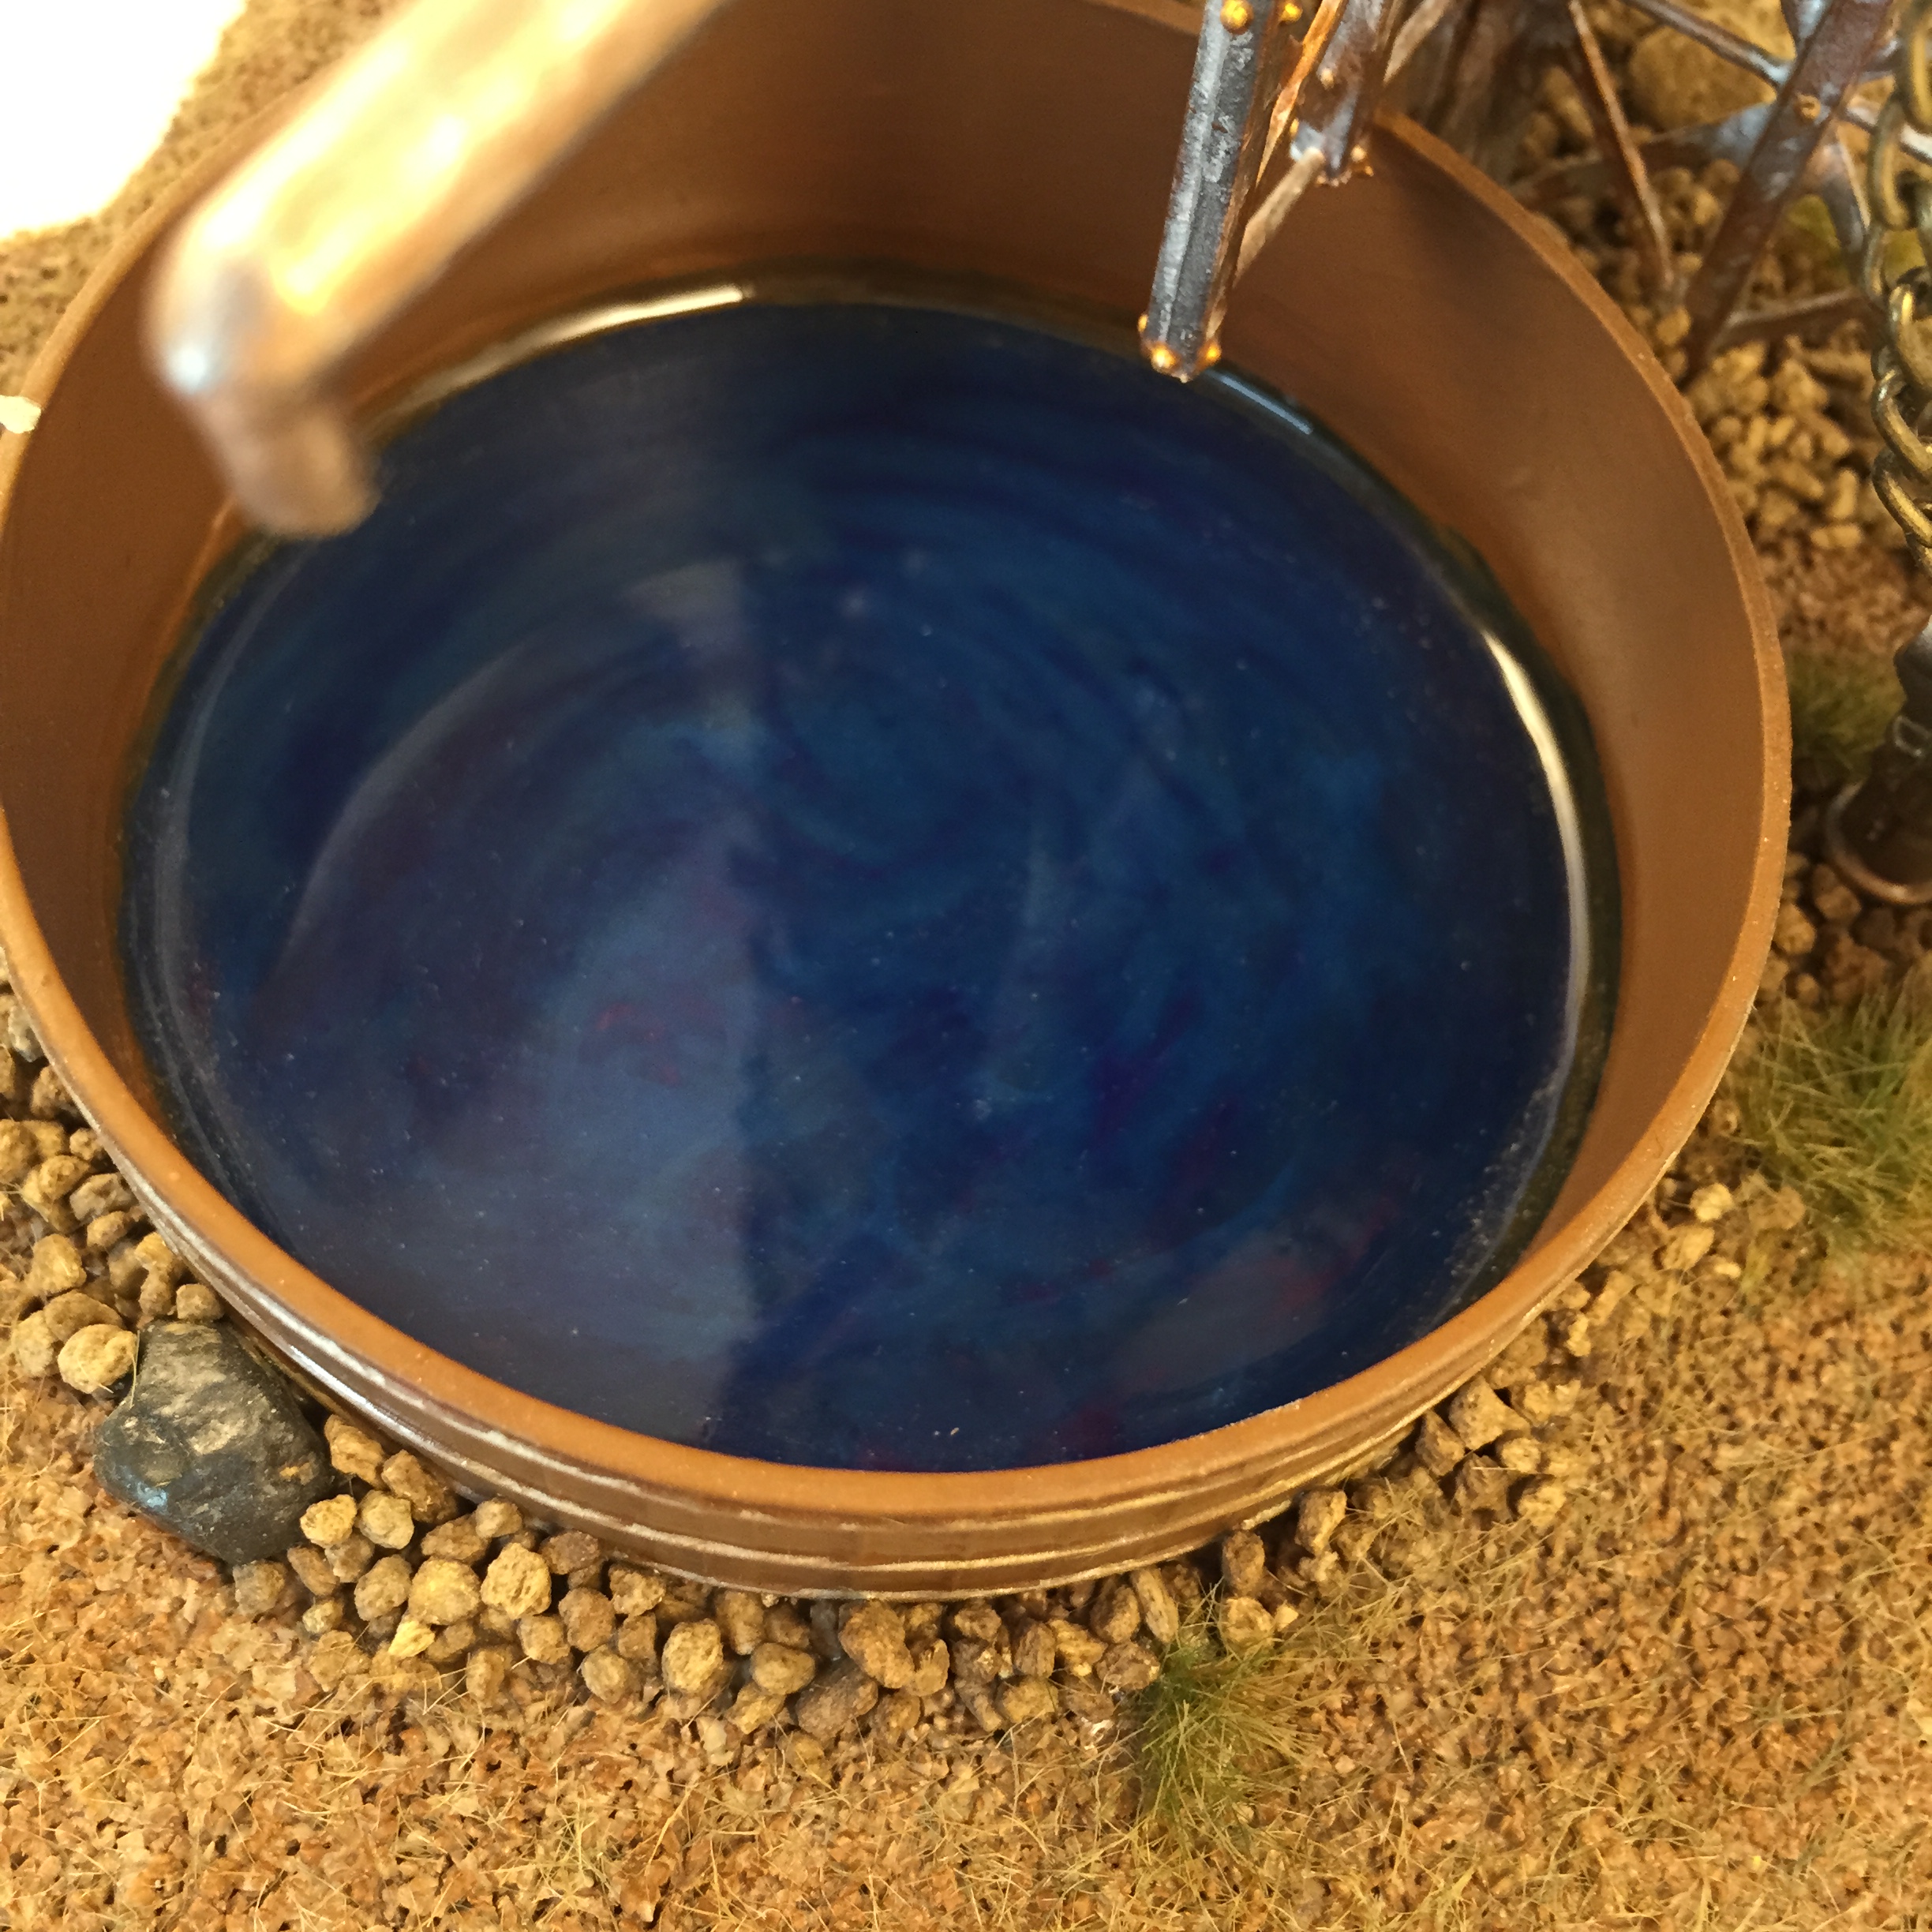
Inside the water trough/dice catch, I decided to try out water effects for the first time. I went with Woodland Scenics Realistic Water because the reviews pointed towards it creating a very durable surface. I found it to be an easy to use product; you lay down thin 1/8 inch layers of clear resin and give each one roughly 24 hours to cure. I painted the base a light blue to start with and then put down thin streaks of blue ink between layers to give the water a sense of depth and motion.

2015-07-30 17.42.01

Once I was ready to start the actual painting process, I started with a variety of basic browns and metallics from P3 paints. This was also the first project on which I experimented with Citadel’s technical line. In particular, I used Ryza Rust, Typhus Corrosion, and Nihilakh Oxide all too excellent effect in giving the tower a weathered and worn look. I was especially proud of the oxidized effect on the bronze roof.

IMG_0624IMG_0622

There was a lot of experimentation involved on this project and I learned a lot from it.  Never be afraid to try new techniques.

I’ve finished some Catachans, this was a troop project so I didn’t do a lot of detail on them, in fact I seldom paint them the same way twice.  They look decent but I do these just to relax and because they’re more impressive for their numbers not for the detail.

IMG_1493

Since finishing these I’ve been assembling some Blood Angel Assault Terminators, these are beautiful models and I’ll take some time to do a high quality paint job on them.  I’ve also assembled some Genestealers from the Space Hulk boxed set, these guys will get my standard Genestealer paint job, nothing exceptional but looks good.

Space Hulk Genestealers and Blood Angel Assault Terminators

Space Hulk Genestealers and Blood Angel Assault Terminators

The votes were close on the painting competition, but with the community’s help we have finally broken the tie. Our winner is the Death Company with its fantastic blacks.

IMG_1154

The prize for this competition is some Sci-Fi molds for Hirst Arts, specifically molds #301 and #270.

IMG_20150727_174027629_HDR

These molds are featured in Hirst Arts’ Startship Basic Interiors set. With just these two molds you can already create some very interesting scenes.

Copyright Hirst Arts

Copyright Hirst Arts

Previous post: Five man unit painting competition

I recently picked up the Pegasus Hobbies Syberclicks modular terrain kit to use in a project. It’s an interesting kit designed to allow you to build a variety scifi style buildings using snap together construction. Theoretically, that should result in a versatile set of parts that you can quickly build terrain with, and change the designs anytime you like. In practice, it does not work quite as well as advertised.

The set consists of six identical sprues of molded metallic grey plastic. The set consists of a variety of steel panels, grates, ladders, hatches, and some gothic windows. Everything is laid out so all the parts can be clipped and assembled with minimal cleanup. There are very few mold lines and the parts all have excellent details. Everything feels solid and looks great on the sprue.

2015-07-17 17.35.01

Continue Reading

After seeing this post about painting and depression I had some comments about how I frequently paint when I’m frustrated or angry because it forces me to focus.  This works because I keep multiple projects going so I’ve got a project I can work on regardless of mood.  All the projects I tackle fit into one of three categories, a detail project, a troop project and a large project.

The detail project is a single model where I’m trying to paint to my top level.  This usually requires substantial focus, a steady hand and time to dedicate to it.  Examples are my Death Company and Blood Angels Captain.  My current detail project is a squad of Assault Terminators.

IMG_1154

IMG_1084IMG_1408

The Troop project is for lack of a better word an easy project.  These are units that I try to paint well but I’m not overly focused on.  These are models that are more impressive for the number of them instead of standing out individually.  The great part of these units is that I can’t paint them in any mood, minor stray marks and individual details and highlights aren’t as important.  Examples are my Astra Militarum/Imperial Guard troops, or my Genestealers.  Currently I’m working on some Catachan Veteran Troops.

IMG_1173 IMG_1407

My last type of project is a large project, these can be terrain pieces, monstrous creatures or vehicles.  These I tackle at different levels of detail but the common thread is that any given step can take a substantial amount of time due to the scale. Examples of these are my Baneblade, the Sanctum Imperialis,  and the Dreadnought.  I haven’t decided on my next large project yet, I just finished the Baneblade but I’ll come up with something soon.

IMG_1388

IMG_1165_edited-1IMG_1091

The other part of my 3 project method is I try and do something every night. Some nights I’ll paint a whole model or weather a large model.  Other nights all I get done is painting a boot on a troop.  The truth is I don’t know how much I’ll get done any given night until I try.  Sometimes I think I won’t get much done and find I start painting and get quite a bit done.  Other nights I just get a little bit done.  The nice thing about getting a little bit done is if you get a little bit done every night, you find you finish a project anyways.

The Neutral-Evil authors recently held a painting competition for a five man unit. Take a minute to help us determine the winner! Vote Here

Death Company

IMG_1154

Ork Nobz

IMG_0427

Chaos Space Marines

IMG_1275

Grey Knights

DSC_4508

Sanguinary Guard

Sanguinary Guard - 1

The Baneblade is finished!  The differences are subtle from the last update, the lenses and lights are all finished, soot was added to the gun barrels and the exhaust and mud and dirt was added to the tracks and the bottom of the tank.

This tank is my entry into a competition that’ll wrap up with a poll posted in the Warhammer 40k Google + community! We still have until August 3rd before the competition is over so stay tuned to this blog for the other entries!

IMG_1388 IMG_1389 IMG_1390 IMG_1391 IMG_1392 IMG_1393 IMG_1394 IMG_1395 IMG_1396 IMG_1397


For those who’d like to see the previous posts on this, they’re linked below, I’ll eventually put together a slideshow of the process as well including colors used and post that to youtube.

Thank you for following along!

Baneblade weathered and ready for last details.

Camo basecoat completed on Baneblade project

Camo netting and Sandbags added to Baneblade

Adding detail to the Baneblade

http://misterfairweather.blogspot.com/2015/05/baneblade-progress.html

I reviewed the Mantic Marauder Raptor a few weeks back and mentioned that I would be converting them to serve as my Ork Warbuggies.  Having gotten them assembled I went right to work on the converting process.  I ended up going with only a few minor changes as I found the Raptors to be very close to the look I already wanted.  Mantic’s models do not have quite the same level of detail as Games Workshop’s releases, but I they get some points for the cooler buggy design.

I did have to replace the gunners of course, as mentioned in the review they were a tad small and oddly posed.  As a replacement, the Ork Gunner model from the Games Workshop Gorkanaut was damn near perfect for my purposes.  Thankfully, I recently picked up a few sprues of them in a bits lot.  I added some shoulder armor from the Ork Nob sprue to make them look a little tougher and they fit the buggies as if they were made for them.

2015-07-05 09.20.432015-07-05 09.21.26

For the Warbuggies themselves I fashioned unique front fender armor for each from Killa Kan bits and then decorated them with Ork Glyphs from the Trukk kit.  Almost every Ork kit comes with extra decorative bits, and half the fun is finding unique ways to use them.  The end result were Warbuggies that fit all my Orky needs, ramshackle vehicles that still looked like they could move fast and spit out plenty of dakka.  I was tempted to magnetize the weapon so I could swap in Big Shootas, but honestly I plan to run these guys primarily as tank hunters so ended up just gluing the rockets in place.

2015-07-02 20.34.00

I also added a base to each of them using a bit of metal tubing and some square 40mm Warhammer Fantasy bases.  This was to add some stability on the table and so that I could magnetize them for transport as I use metal trays.  The squares were positioned so that unless you are looking for them they are pretty much invisible beneath the rear of the buggies.

2015-07-05 09.22.43

For color scheme, I followed the same palette I have used on my other customs so far.   I put a red base over most of the vehicle, and then a mix of gunmetal, silver, copper, and brass on the various metallic parts.  I picked out various bolts and panel edges to give it a scratched up look, dry brushed Ryza Rust over the gunmetal, then washed it all in nul oil.  Then I hit the tires and under carriage, including the base, with typhus corrosion for a textured mud covered look.  I also picked out one sigil on each to hit with purple as I have made that something of a unifying element with this force.

2015-07-08 22.41.22

While they all look great together, here are a series with a closer look at each.  Followed by a group shot with my Warboss and Painboy.  So far this Road Waaagh!!! is coming together nicely.

2015-07-08 22.41.39 2015-07-08 22.41.55 2015-07-08 22.42.07 2015-07-08 22.42.20 2015-07-08 22.42.31 2015-07-08 22.42.41 2015-07-08 22.45.18 2015-07-08 22.47.33

Since the last post most of the work has been weathering.  The effects are Subtle but worthwhile. First step was to sponge on the base color of Vallejo Model Air Sand Yellow.  This makes it look like the camo layers have been chipped down to the bottom coat of paint.  Next Citadel Eshin Grey was sponged on to simulate the paint being chipped through clear to the primer.  This was all sealed with a coat of Future floor polish.

IMG_20150705_100838-nopm-

After that I’ve applied an oil wash with a mixture of black and brown oil paint to the panel lines to give them more contrast as well as did a pin wash with oil to the heads of all the rivets.  After about an hour I took a brush and I worked the oil paint into the surrounding area and dragged it downwards to give the weathering a sense of streaking.

IMG_20150707_214545-nopm-

From here I made a mixture of Brown oil paint and rust colored weathering powder and flicked it randomly on the model to create a few rust spots.  These spots were sprayed with mineral spirits to blend them in with the paint.  The running wheels were sprayed with a fresh coat of Dessert yellow paint and sealed with Future (I should have done this before the first time I hit it with future, there are no mistakes just changes in plans).  The running wheels were then flooded with some mineral spirits and oil wash flowed into it, the extra mineral spirits on the running wheels makes sure the oil wash flows into the crevices.  The rubber part of the wheels were painted with Valejo Model Color Black Grey.  The barrels of the guns are painted with Citadel Warplock Bronze, Citadel leadbelcher was drybrushed over it.

I mixed some rust colored weathering powder with Citadel Calthan Brown paint and painted on the Exhaust stacks.  A lighter rust powder was mixed into some brown oil wash and painted over the top of the exhaust stacks and the tow chain on the front.
This puts me where I’m at now! A lot of the work is done, I’ve got to do some work with dirt weathering powders on the tracks and the lower half of the tank. Lenses and lights need paint, and some soot to a few spots.

IMG_1375 IMG_1377 IMG_1379 IMG_1380 IMG_1381 IMG_1382

Previous posts in series

Camo basecoat completed on Baneblade project

Camo netting and Sandbags added to Baneblade

Adding detail to the Baneblade

http://misterfairweather.blogspot.com/2015/05/baneblade-progress.html

If you are going to run Orks, you need someone to patch up your boyz when they inevitably get shot up by the enemy. Thankfully, there are Painboyz with their ‘Urty Syringes, collection of rusty Doc Tools, and pack of Grot Orderlies running around ready to reattach an arm here, replace a leg there, maybe add a rocket launcha just for kicks. Naturally, I needed one in my army, and since I’m going for speed he was going to need bike.

There is a fairly cool looking plastic Painboy model available now, but for this project I decided to go with the older design which is still available in Finecast from the Games Workshop website. This was my first experience with Finecast and I am kind of hoping it will be my last. It is a very fragile material, which makes it easy to cut up for modifications, but also means that pieces break off at the slightest pressure.  I spent more time trying to get the doc to stay together then I did building his custom bike.

1

For that custom bike I needed a suitable base. I could have just used an Ork Warbiker, but since the Painboy model came with a Grot, I figured it would be nice to have a sidecar so he could ride shotgun and keep the docs tray of pointing doc tools at the ready. Thankfully, Games Workshop just happens to have a Space Marine bike that was perfect for my purposes. It was going to need a bit of work to fit the Ork aesthetic however, far to shiny and new looking.

A Warbiker kit gave me all the parts I needed to properly customize the bike, and I was able to cut up the Painboy and se the Marine biker’s legs to fit the ork right proper in his seat. Some plasticard added some much needed extra armor to the side car and I was ready to prime.

354

I followed essentially the same paint scheme I have used on my previous Ork custom projects. Plenty of red to make it go fast and then assorted metalics with some rust and black wash to give it that beat up look I think an Ork vehicle needs. These are rugged well used machines after all. One thing that might be noticeable is that I decided to give the Blood for the Blood God technical paint a try. I figured a Painboy was likely to spend most of his time covered in blood from all his surgeries, and I really like the effect it gives.

678

One final shot to give some scale. That and I just really like showing off my Warboss. So far my little Kult of Speed is coming together pretty well. I hope to have my trio of custom warbuggies and a bunch of bikes ready in the next few weeks to give me a solid start to this army.

9