Summer 2015 Painting competition entry Baneblade The Emperor’s Persistence


Summer 2015 Painting competition entry Baneblade The Emperor’s Persistence
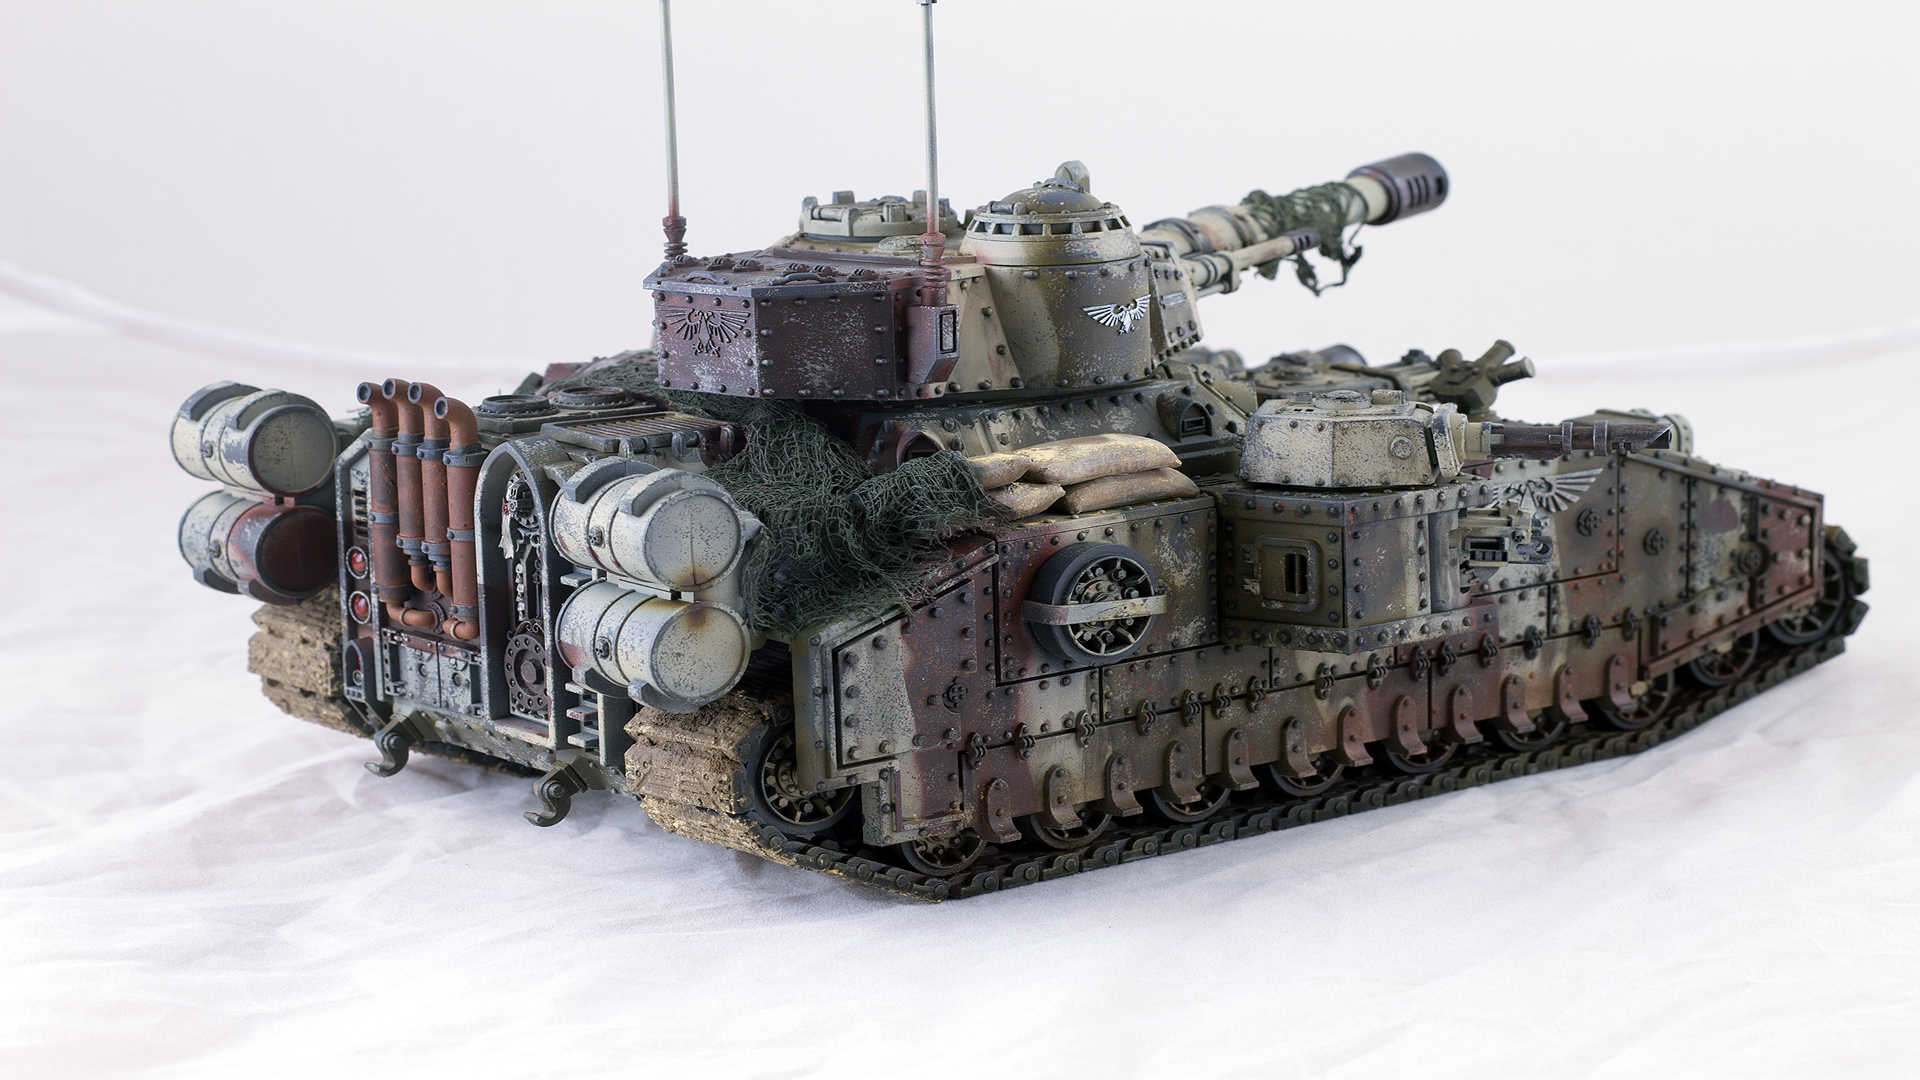
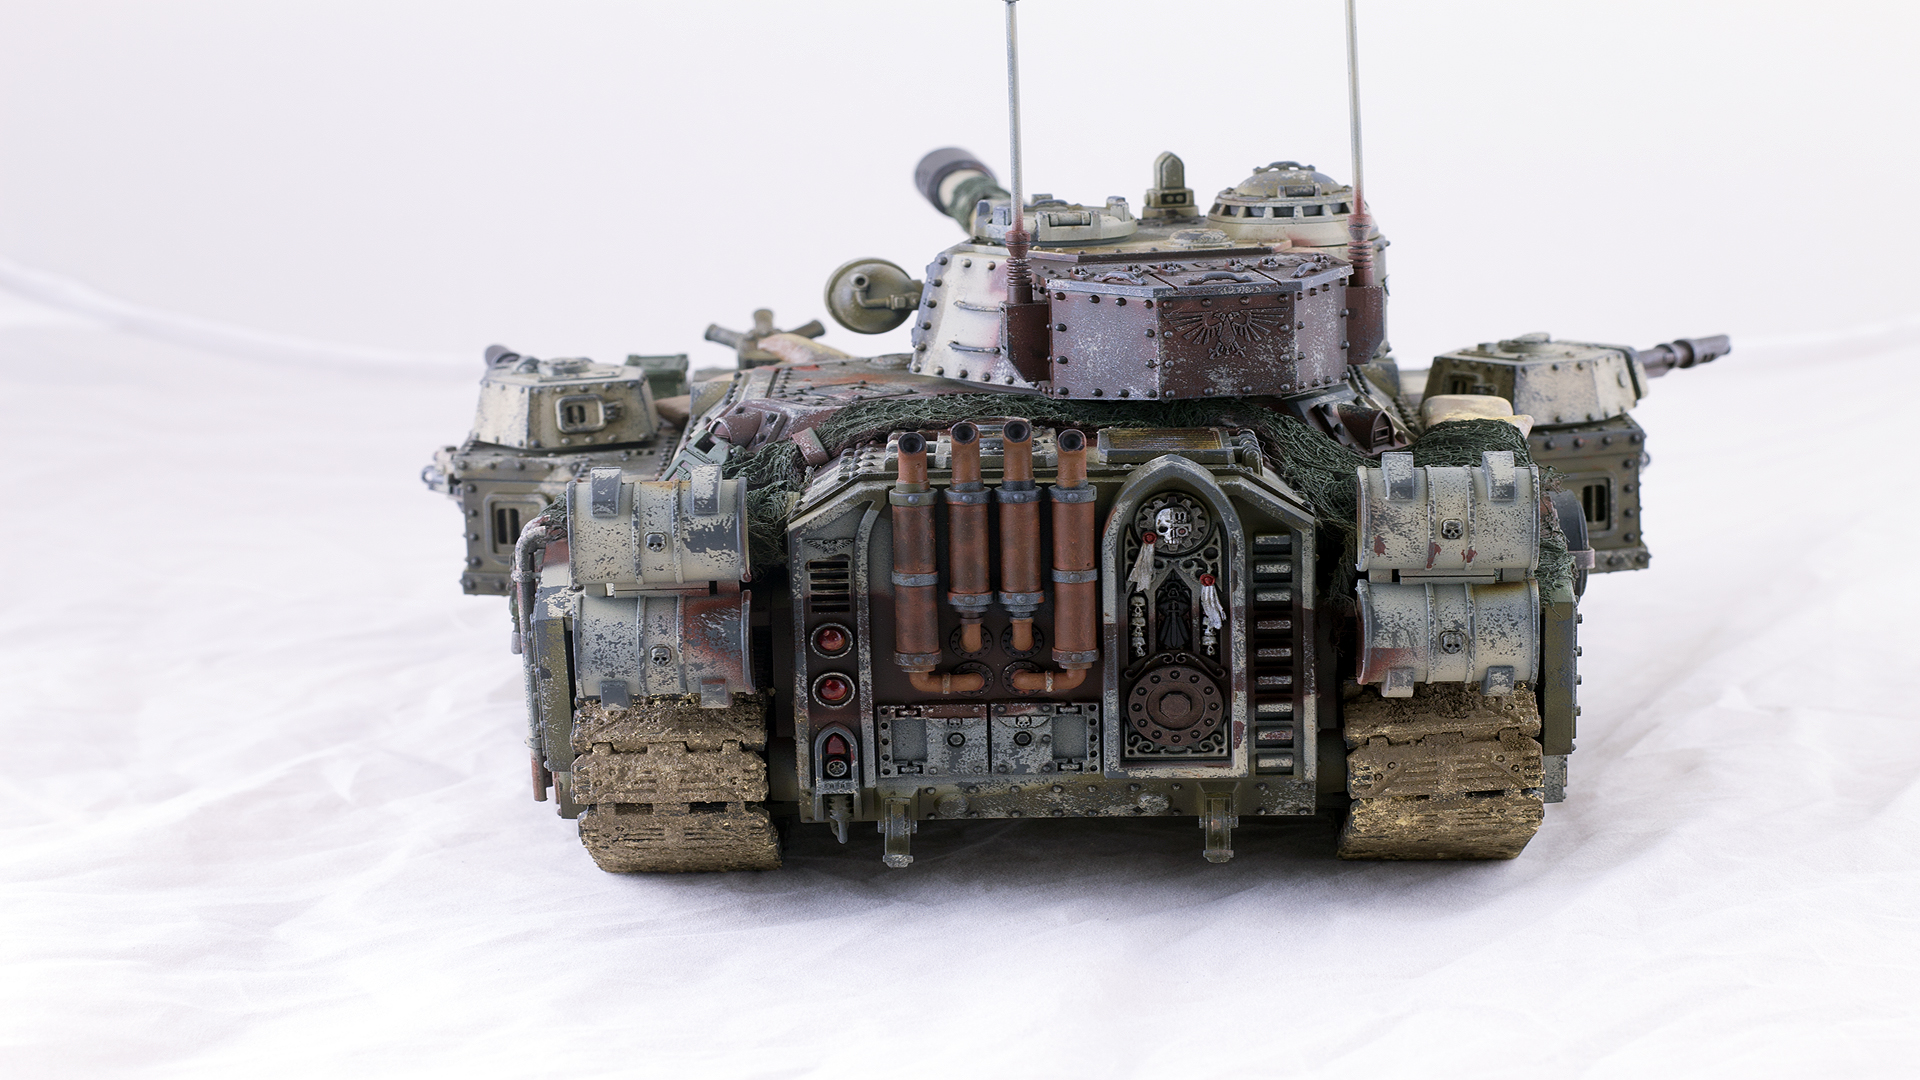
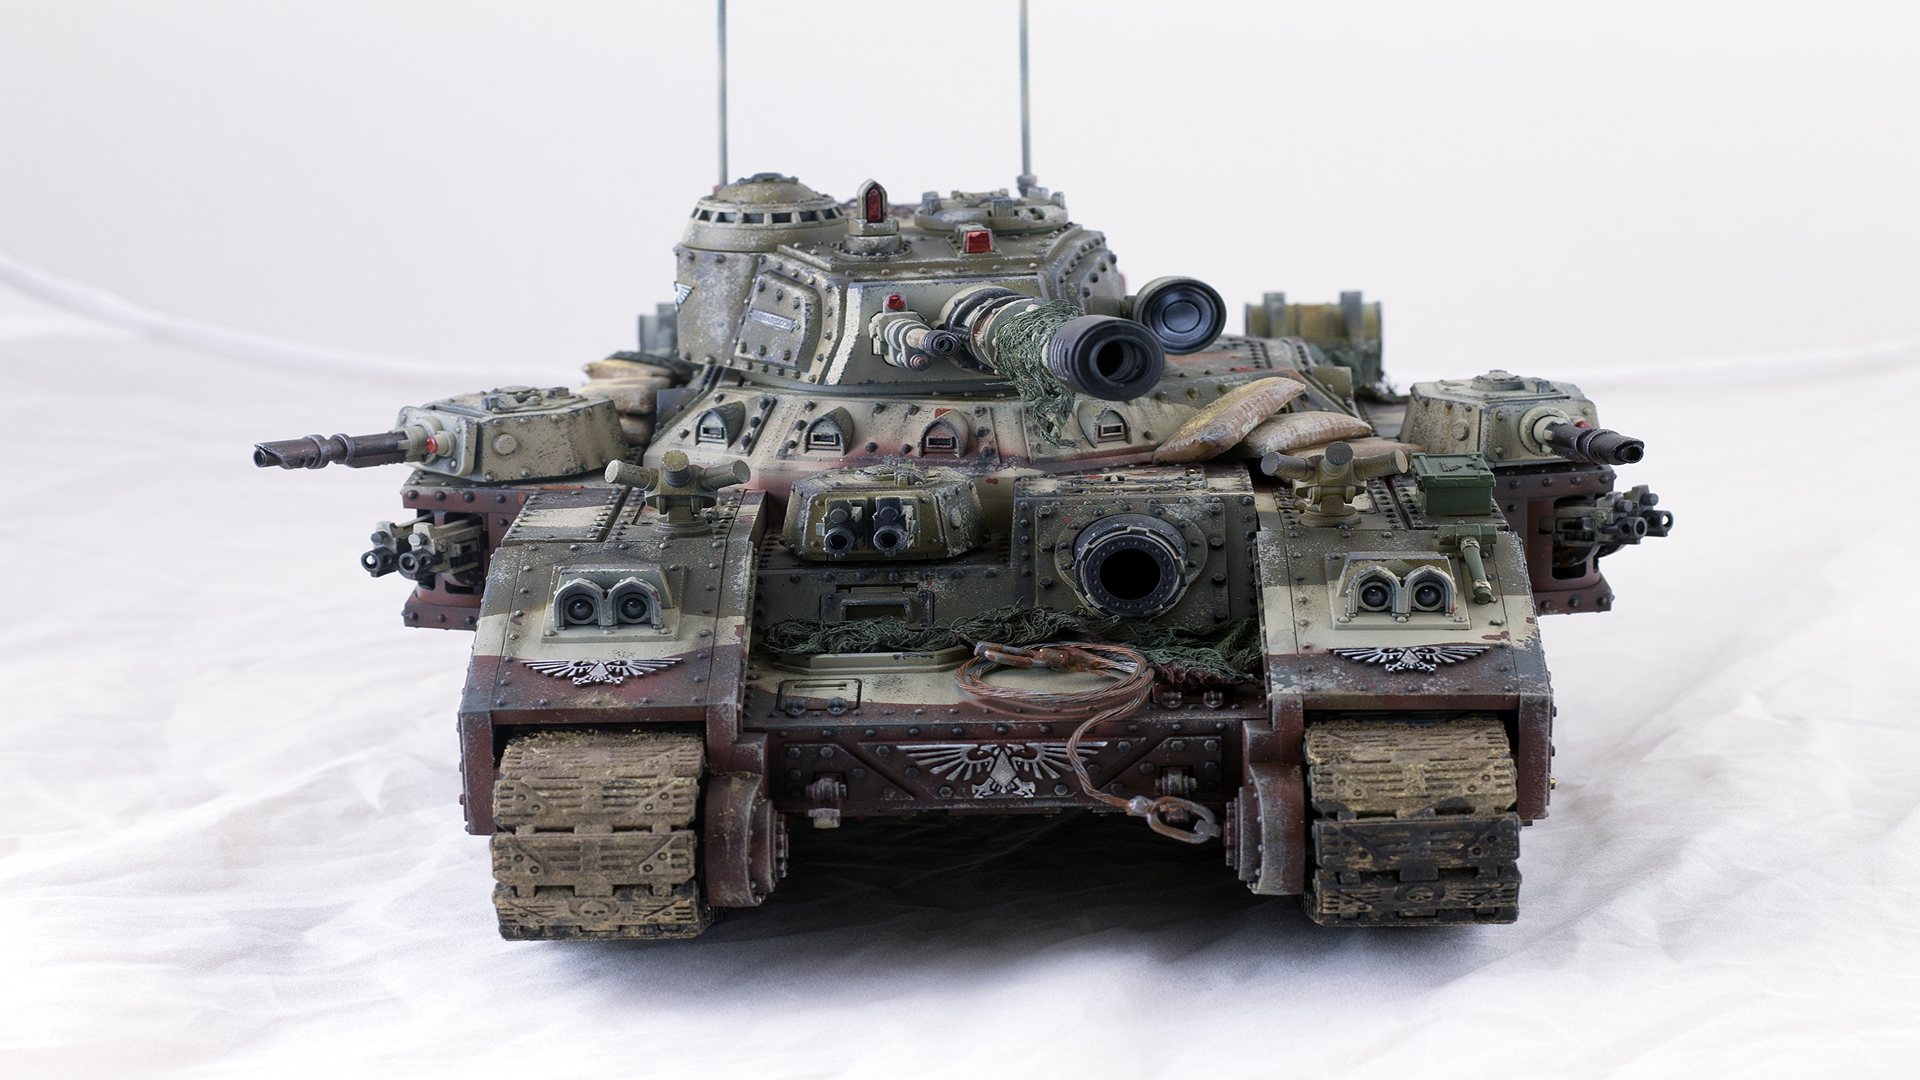
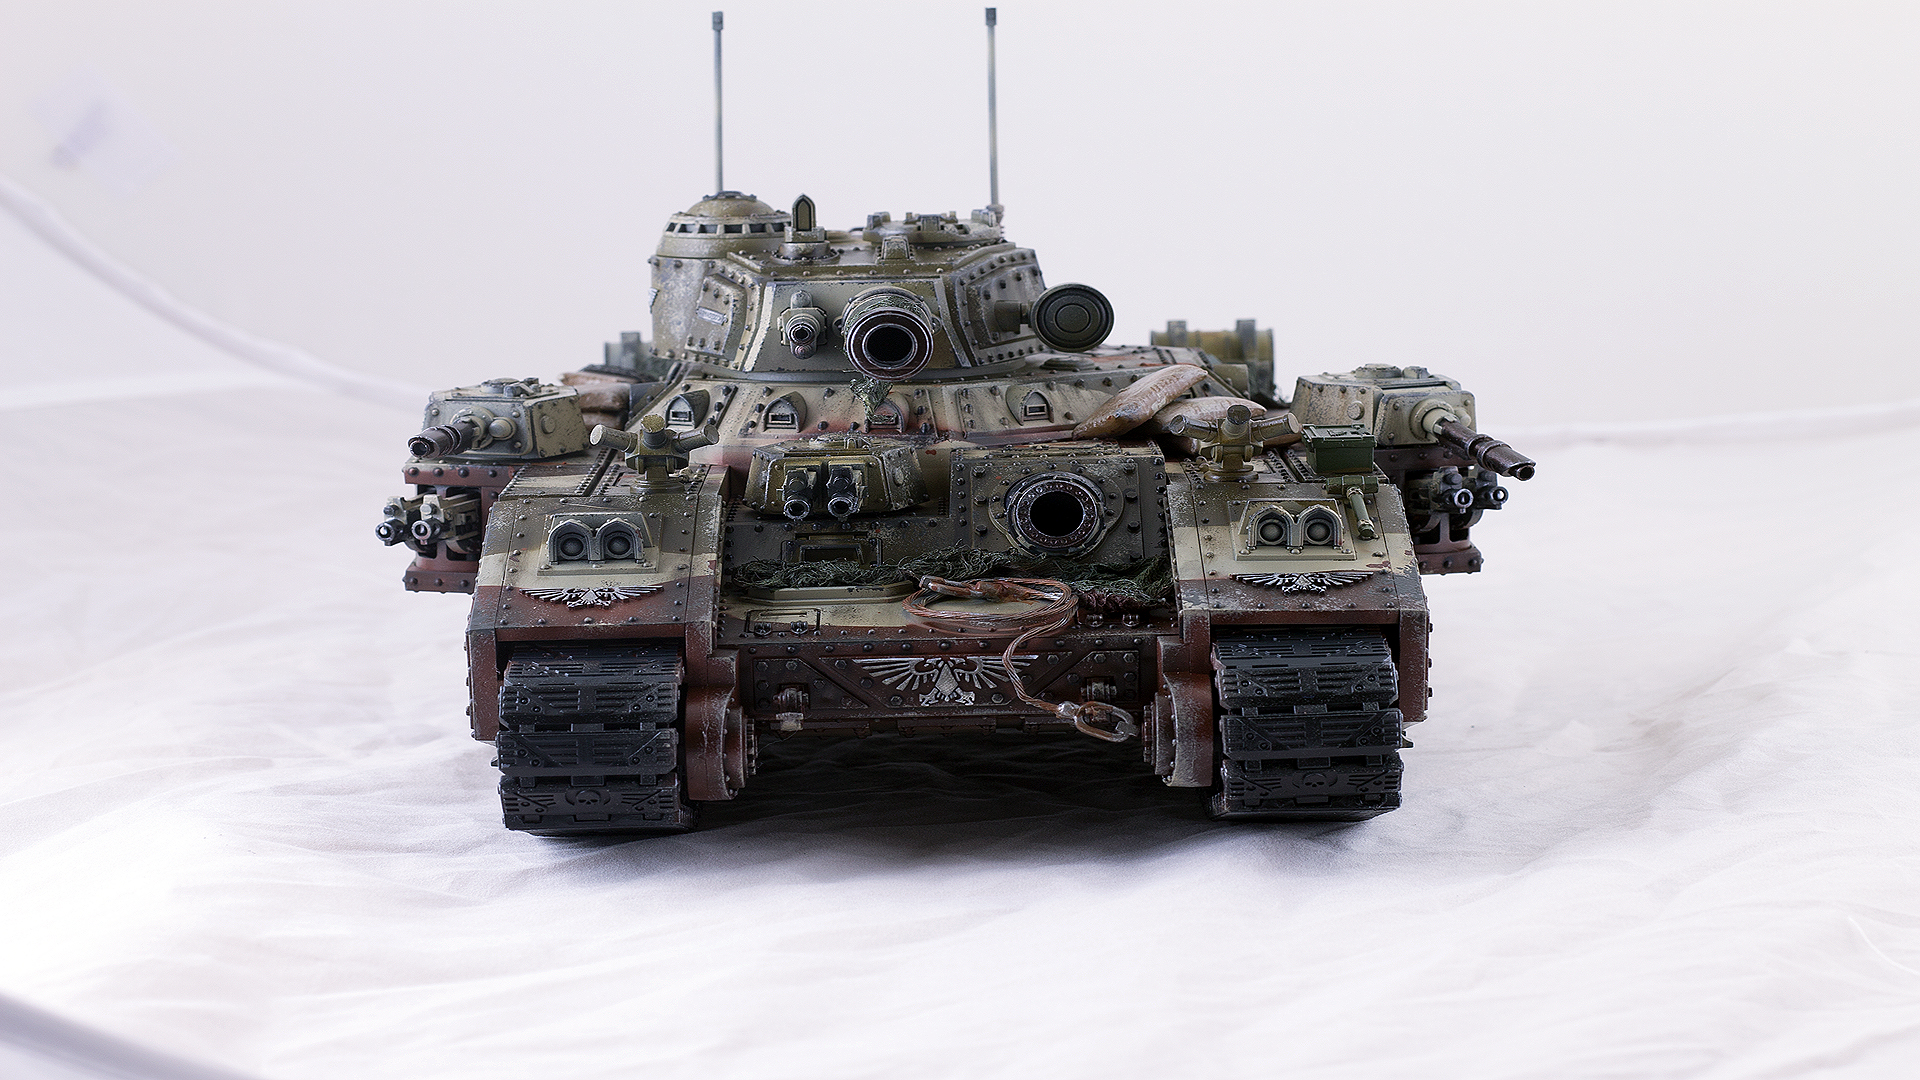
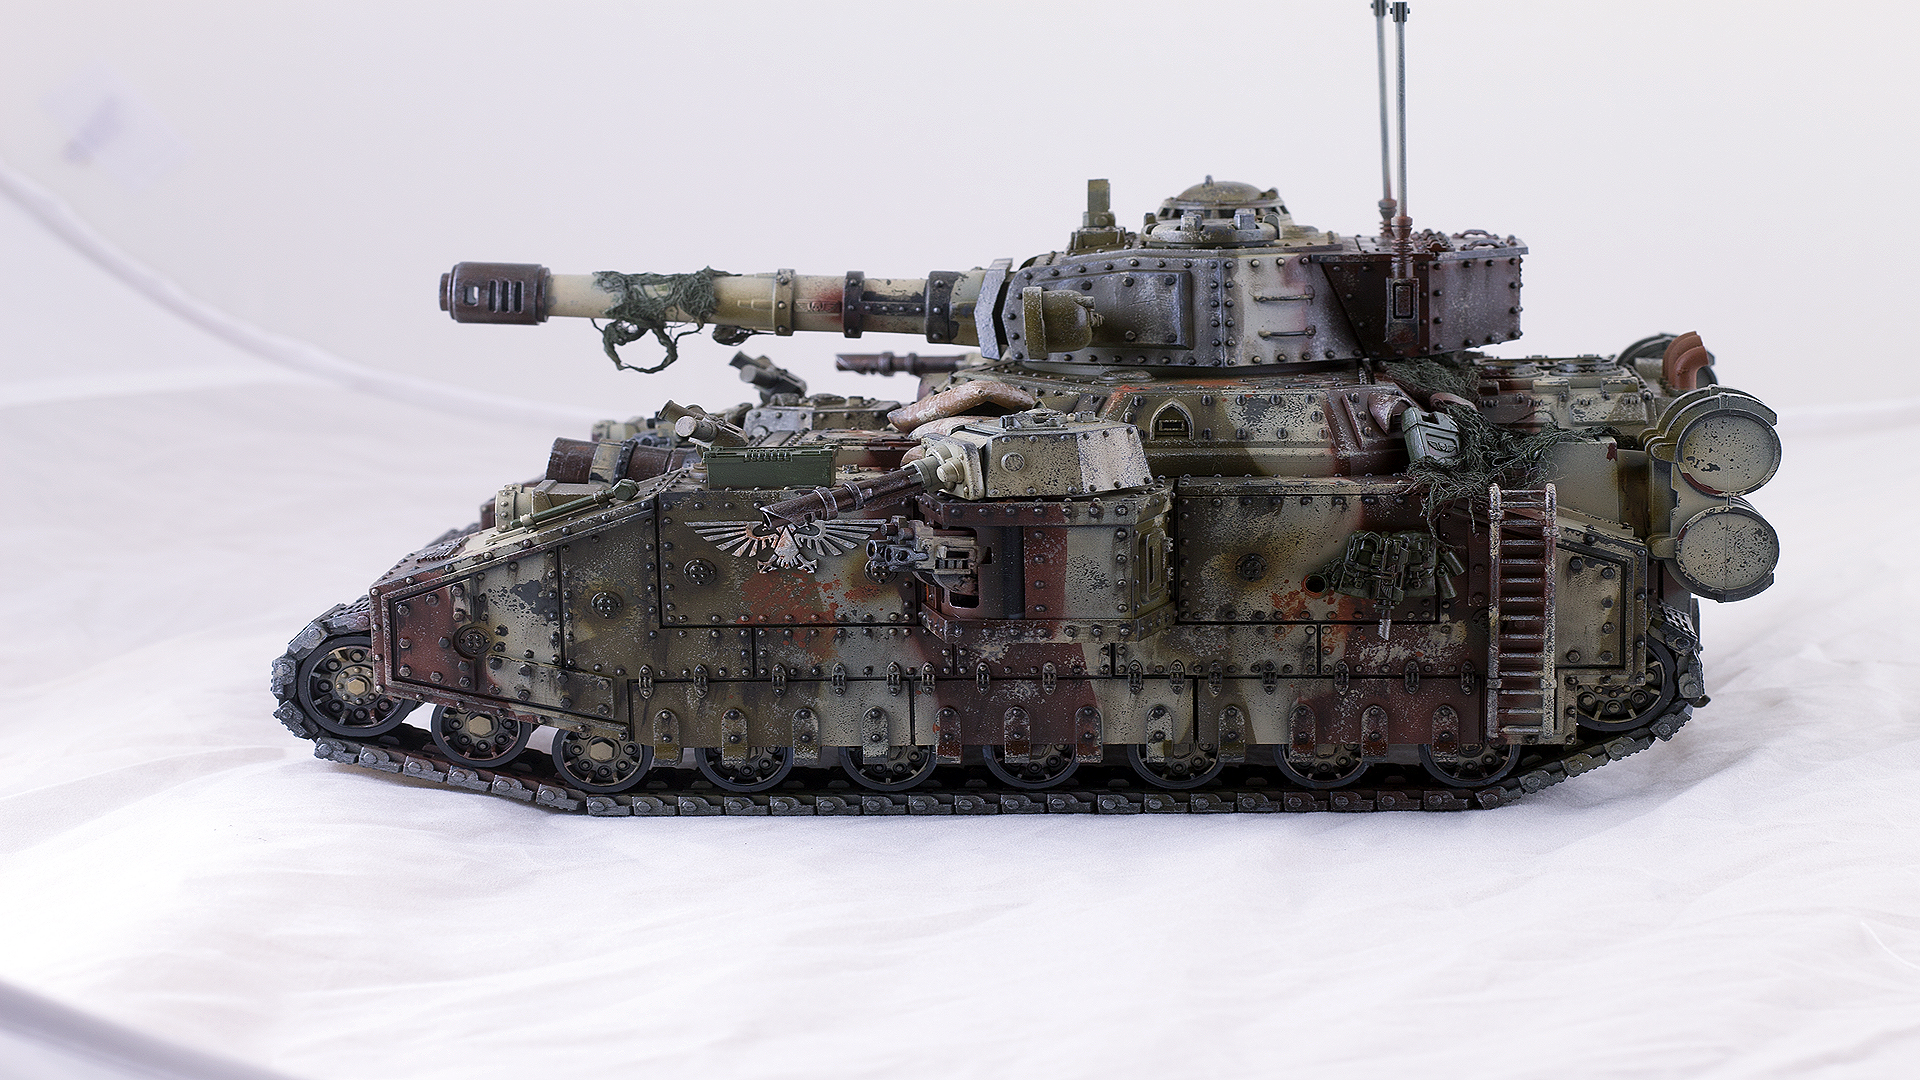
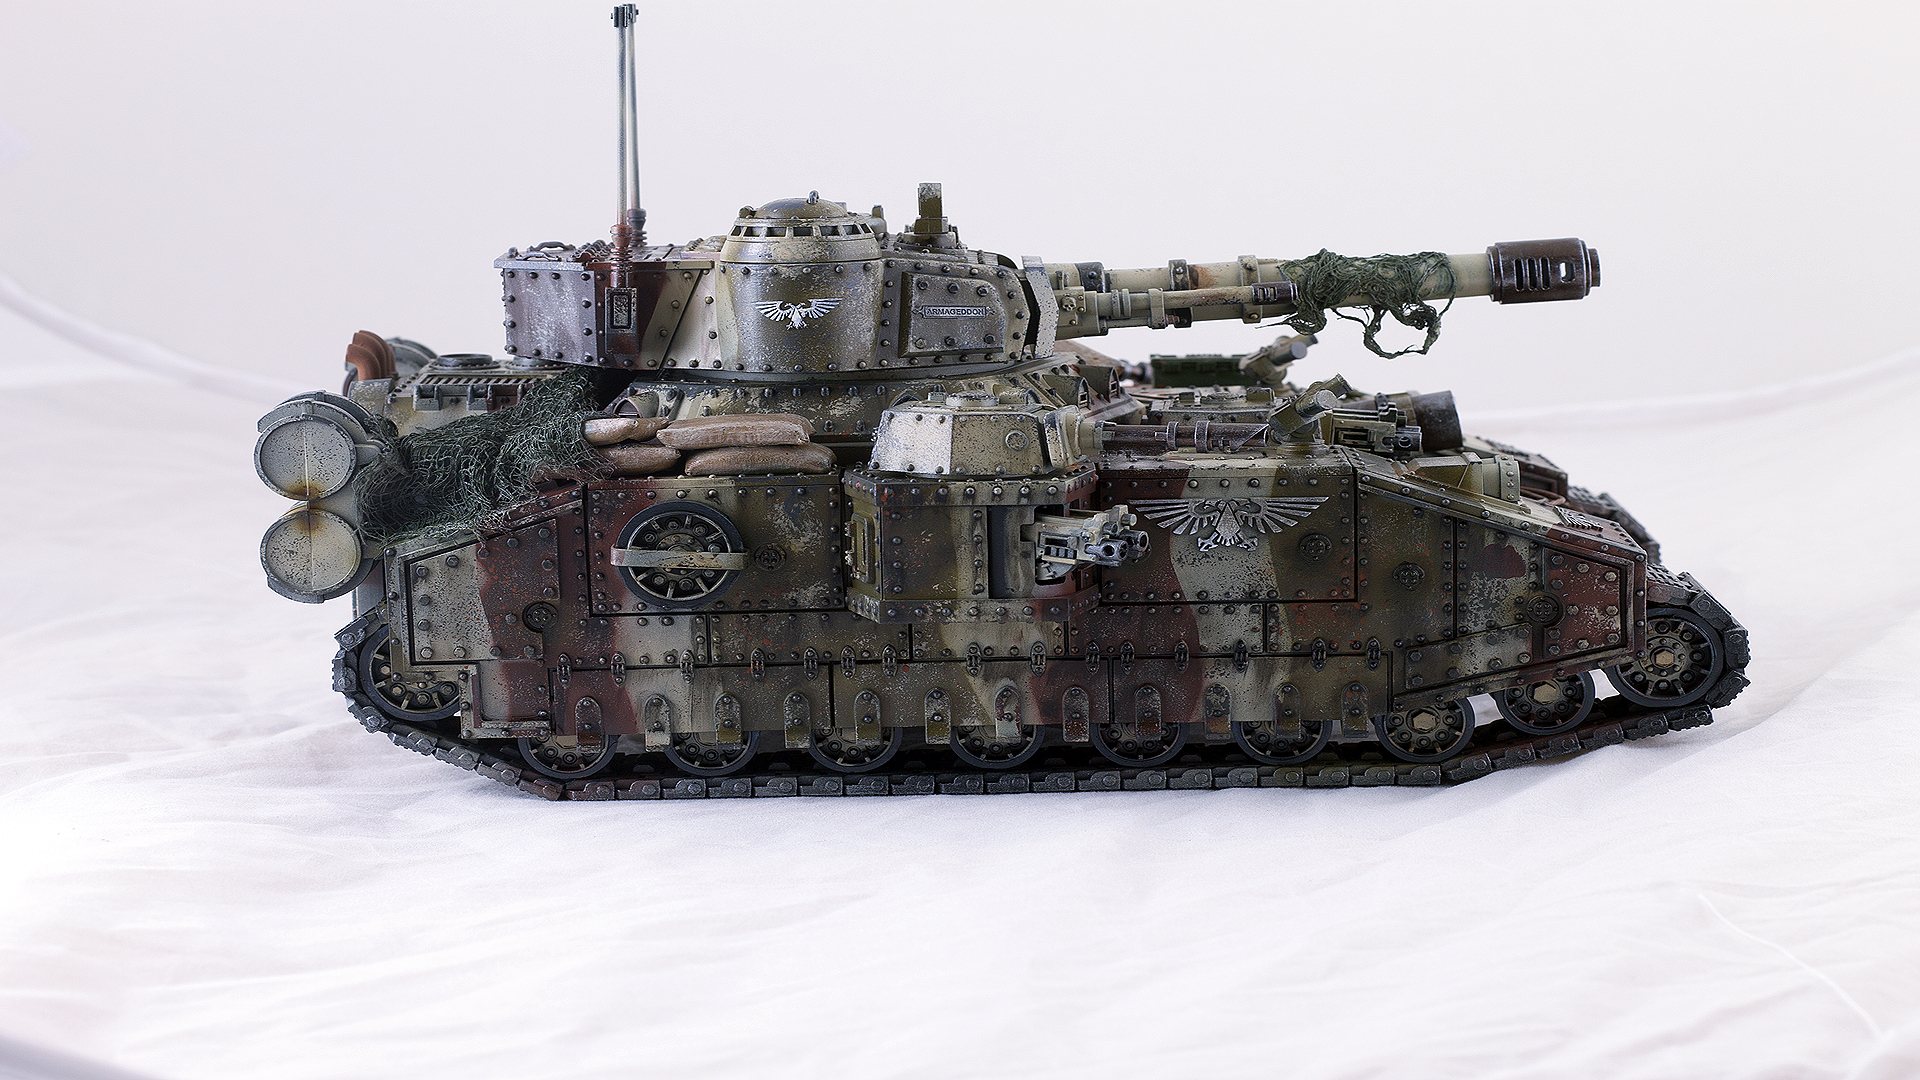
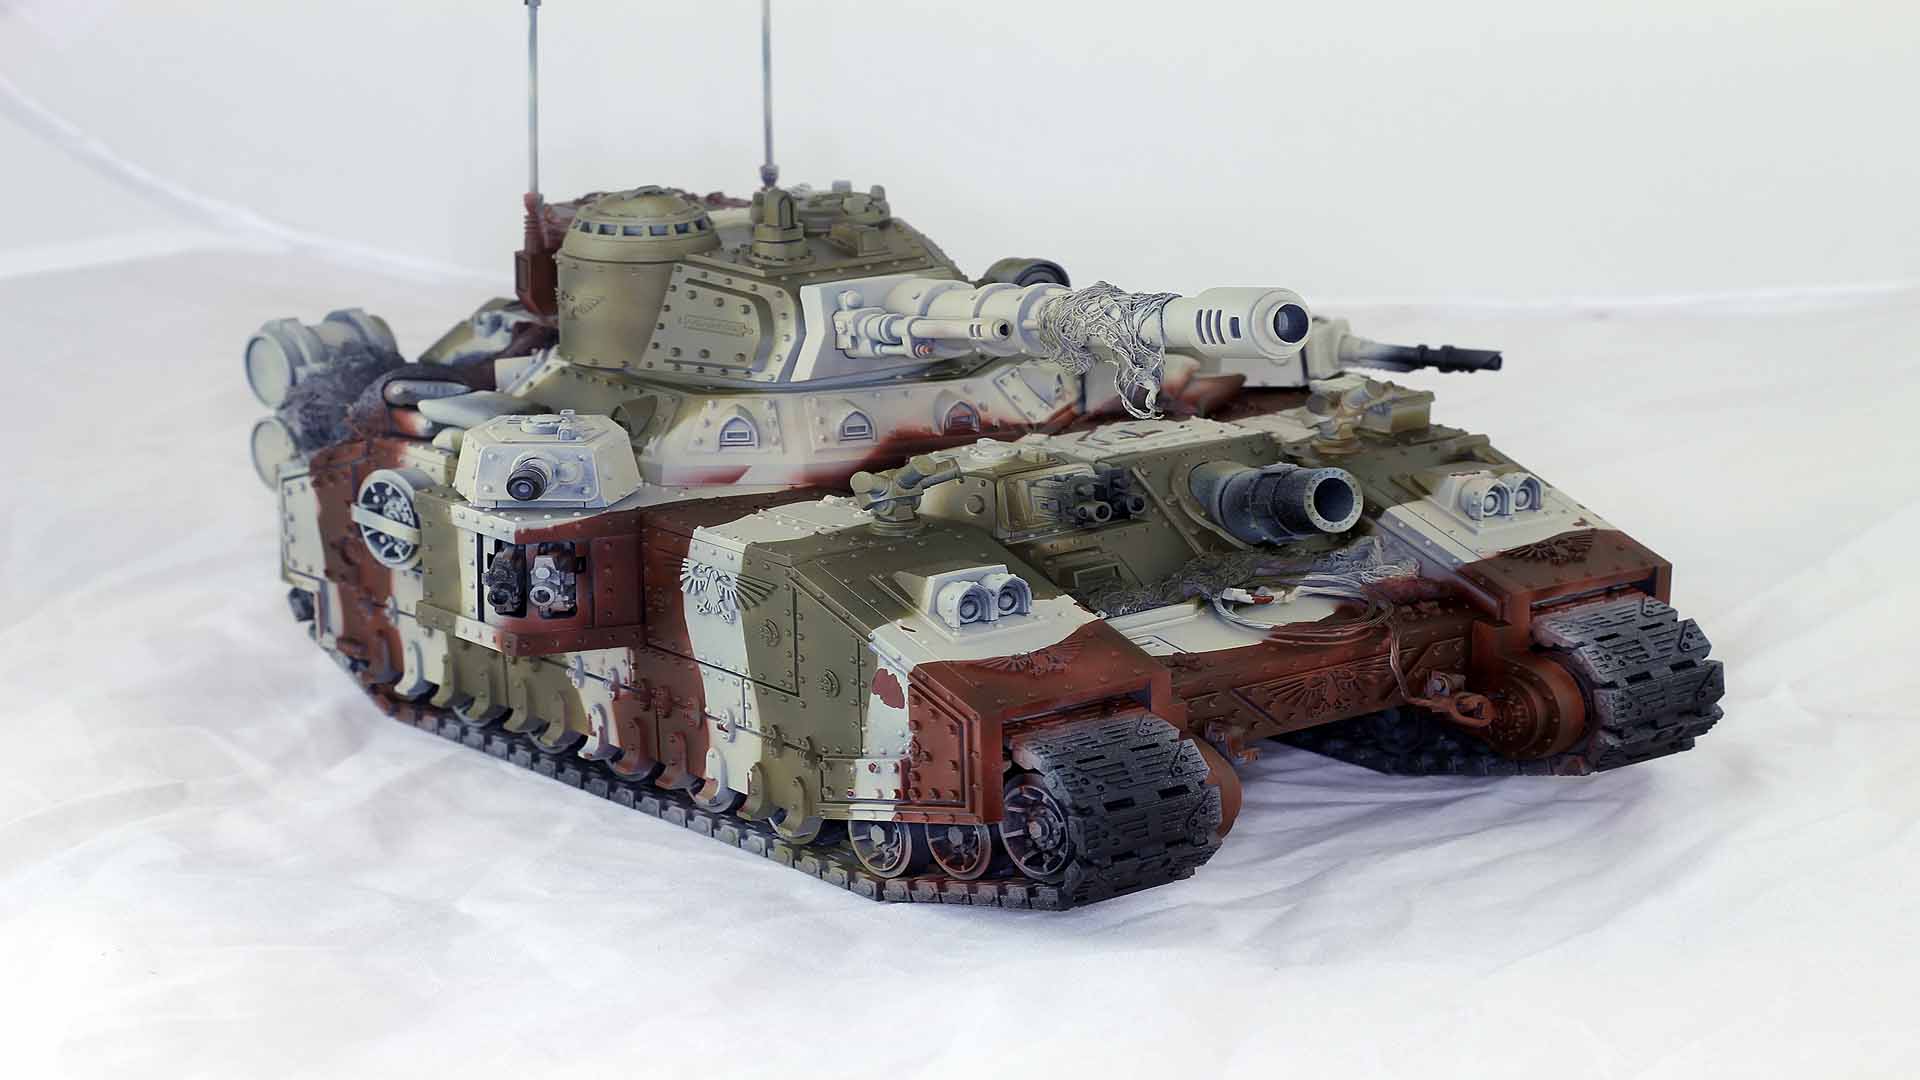
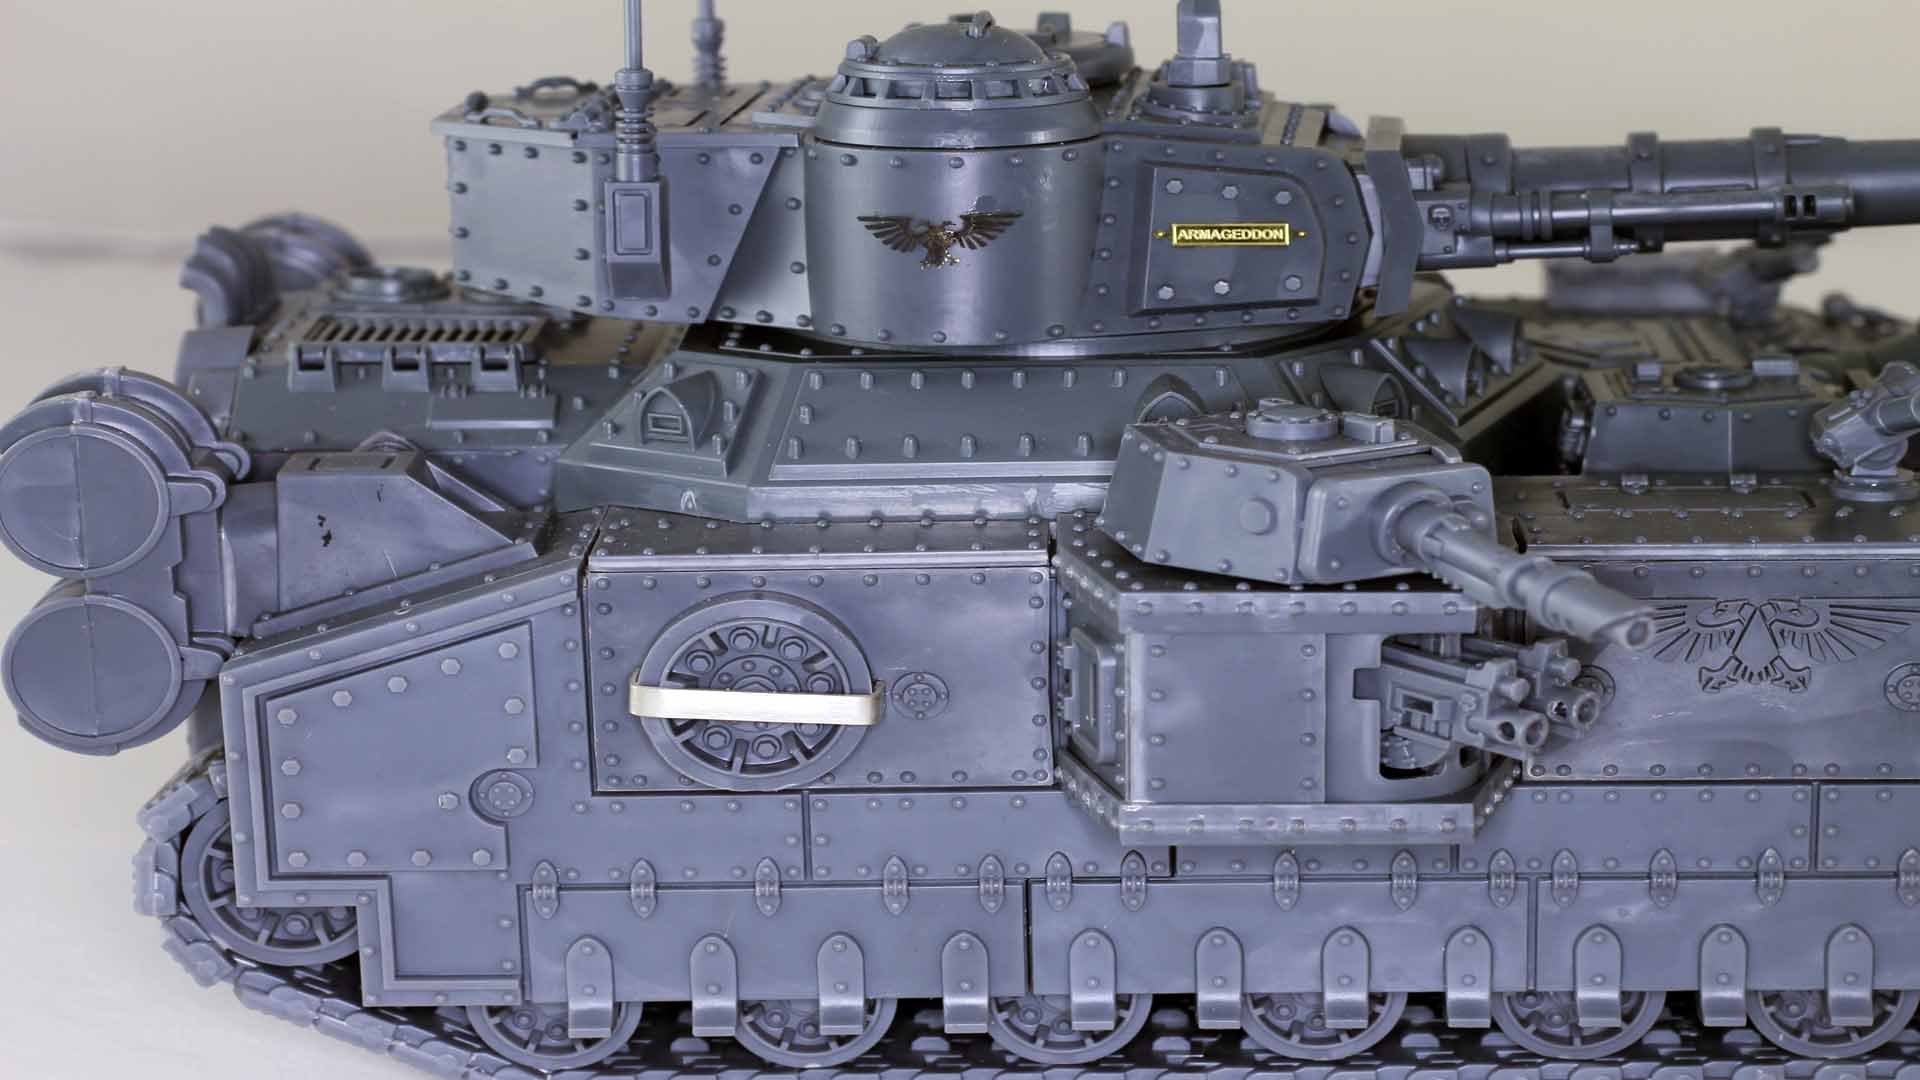
The Baneblade is finished! The differences are subtle from the last update, the lenses and lights are all finished, soot was added to the gun barrels and the exhaust and mud and dirt was added to the tracks and the bottom of the tank.
This tank is my entry into a competition that’ll wrap up with a poll posted in the Warhammer 40k Google + community! We still have until August 3rd before the competition is over so stay tuned to this blog for the other entries!

For those who’d like to see the previous posts on this, they’re linked below, I’ll eventually put together a slideshow of the process as well including colors used and post that to youtube.
Thank you for following along!
http://misterfairweather.blogspot.com/2015/05/baneblade-progress.html
Since the last post most of the work has been weathering. The effects are Subtle but worthwhile. First step was to sponge on the base color of Vallejo Model Air Sand Yellow. This makes it look like the camo layers have been chipped down to the bottom coat of paint. Next Citadel Eshin Grey was sponged on to simulate the paint being chipped through clear to the primer. This was all sealed with a coat of Future floor polish.

After that I’ve applied an oil wash with a mixture of black and brown oil paint to the panel lines to give them more contrast as well as did a pin wash with oil to the heads of all the rivets. After about an hour I took a brush and I worked the oil paint into the surrounding area and dragged it downwards to give the weathering a sense of streaking.

From here I made a mixture of Brown oil paint and rust colored weathering powder and flicked it randomly on the model to create a few rust spots. These spots were sprayed with mineral spirits to blend them in with the paint. The running wheels were sprayed with a fresh coat of Dessert yellow paint and sealed with Future (I should have done this before the first time I hit it with future, there are no mistakes just changes in plans). The running wheels were then flooded with some mineral spirits and oil wash flowed into it, the extra mineral spirits on the running wheels makes sure the oil wash flows into the crevices. The rubber part of the wheels were painted with Valejo Model Color Black Grey. The barrels of the guns are painted with Citadel Warplock Bronze, Citadel leadbelcher was drybrushed over it.
I mixed some rust colored weathering powder with Citadel Calthan Brown paint and painted on the Exhaust stacks. A lighter rust powder was mixed into some brown oil wash and painted over the top of the exhaust stacks and the tow chain on the front.
This puts me where I’m at now! A lot of the work is done, I’ve got to do some work with dirt weathering powders on the tracks and the lower half of the tank. Lenses and lights need paint, and some soot to a few spots.


Previous posts in series
http://misterfairweather.blogspot.com/2015/05/baneblade-progress.html
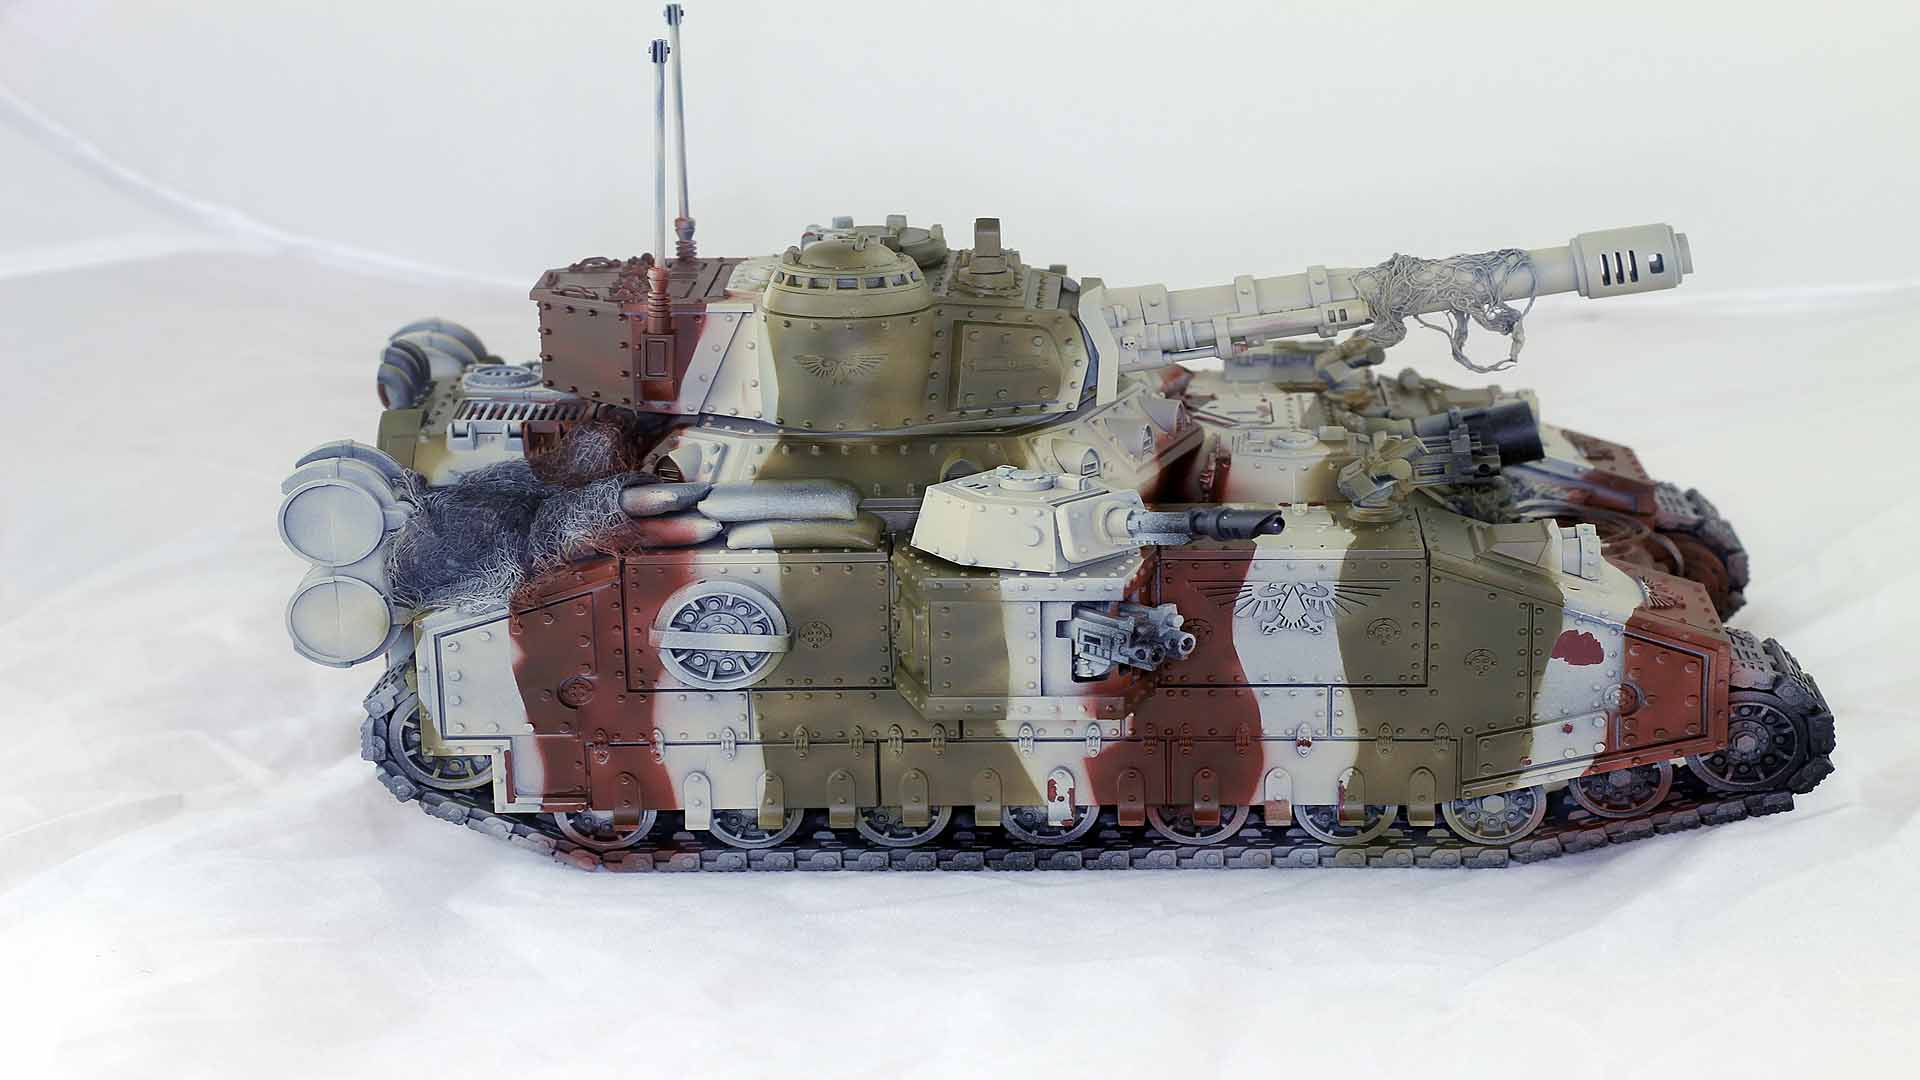
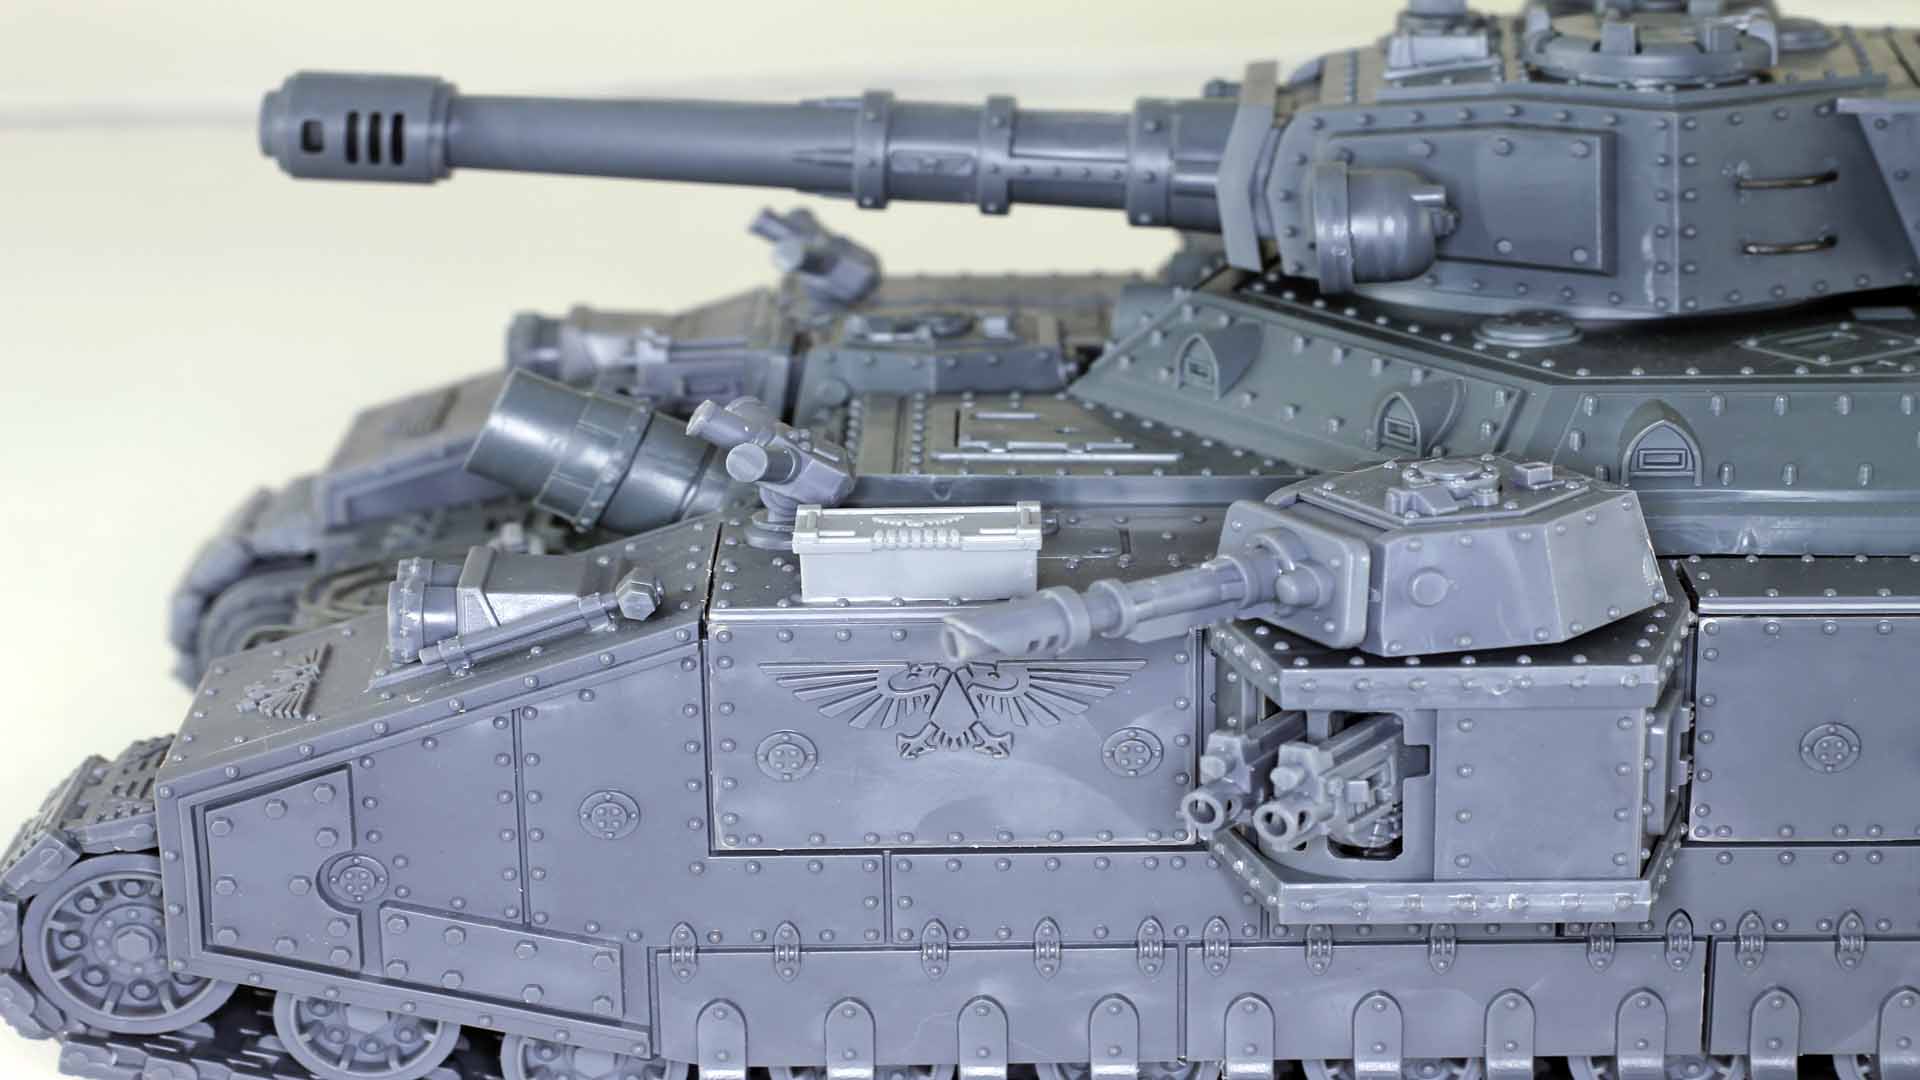
I’ve masked off and sprayed a basecoat on the Baneblade, I had some issue with the paint and primer lifting off when I pulled up the tape so I touched up those spots with a bit of rust red primer. I’ll use this as a guideline for weathering later. Next step is to block in the other base colors on things that won’t be camo like the accessories and netting.


Previous Baneblade posts
http://misterfairweather.blogspot.com/2015/05/baneblade-progress.html
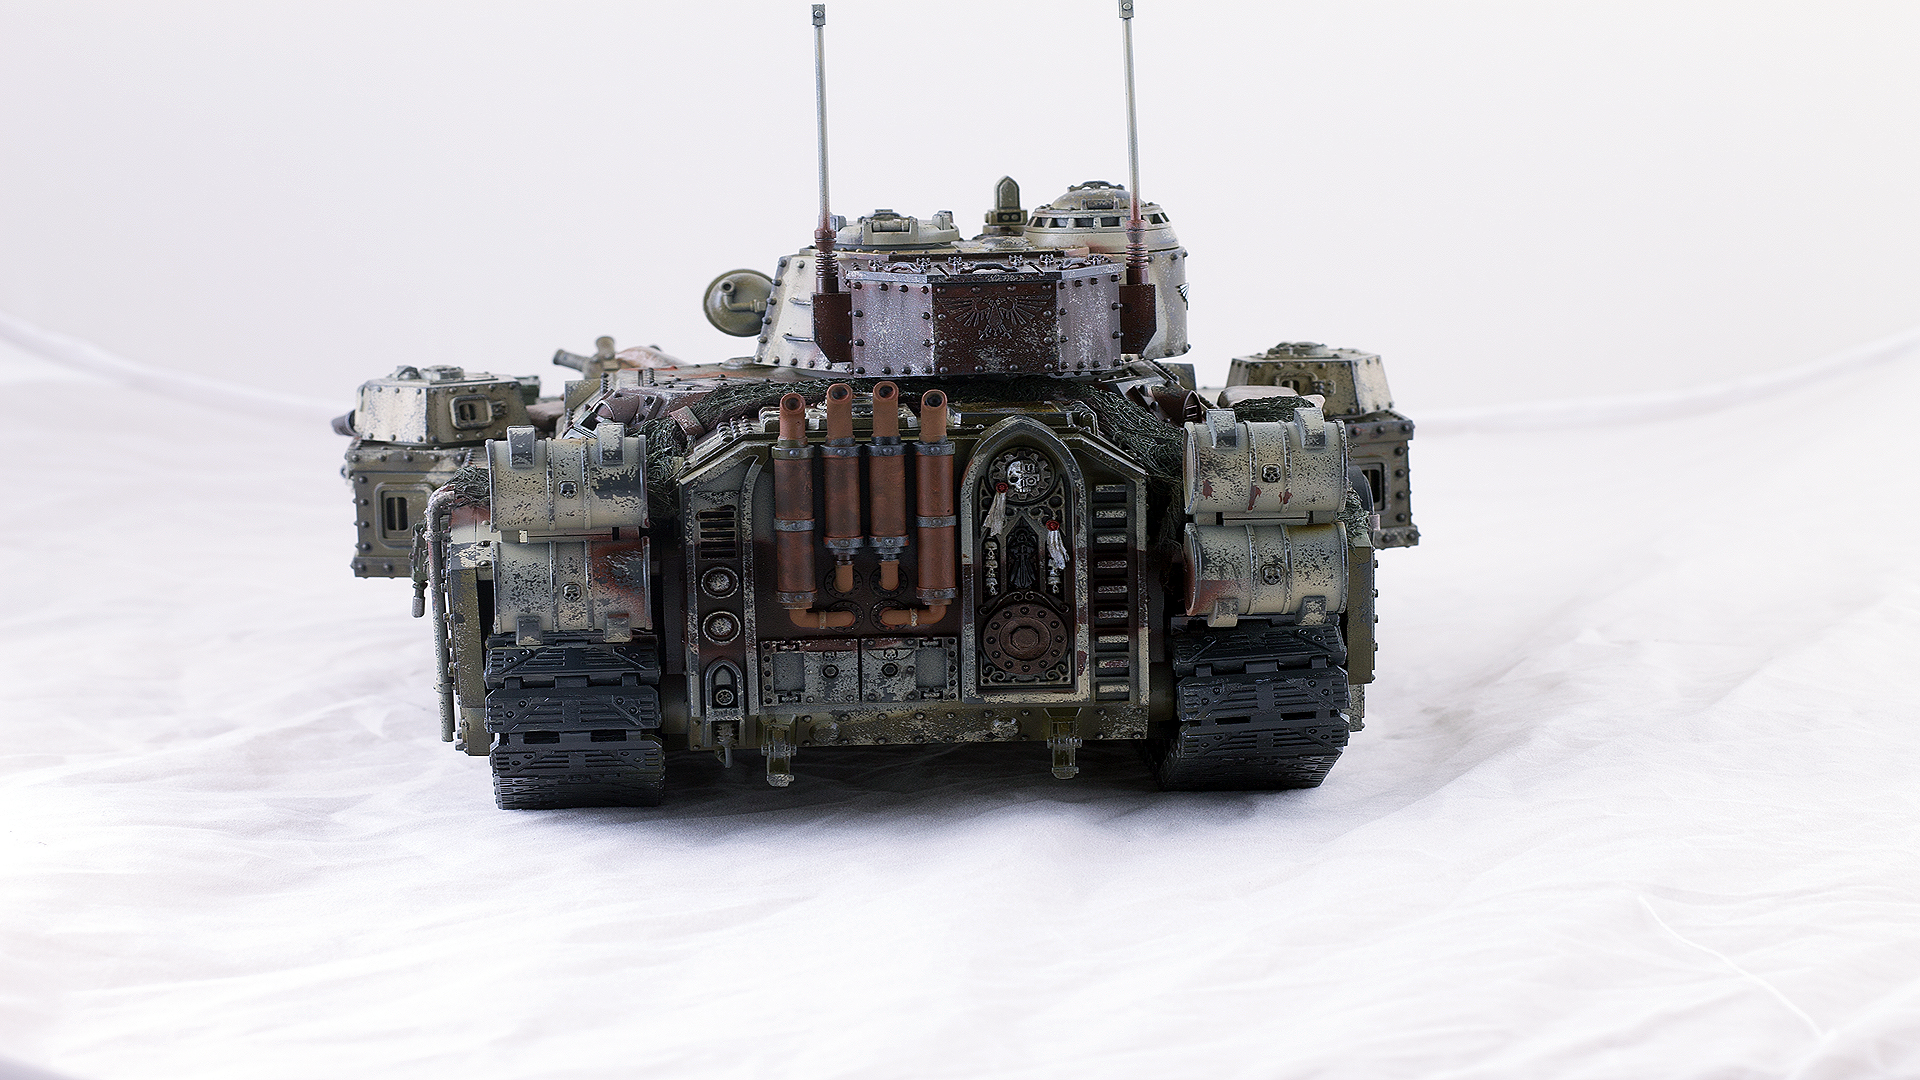
At the suggestion of the fantastic Henry South (http://4gotowar.blogspot.com/) I added some sandbags and camo netting to the Baneblade and it definitely fills up the space and covers up some of the areas of the build I wasn’t as happy with. I also shot a coat of primer over the whole figure to see how it ties together. Let me know your thoughts!


Previous Baneblade posts
http://misterfairweather.blogspot.com/2015/05/baneblade-progress.html – initial construction
http://blog.neutral-evil.net/2015/06/18/adding-detail-to-the-baneblade/ – extra detailing.
My first post on the Baneblade construction. From my old blog, future updates will come here.
I wanted to show some extra details added to the Baneblade to fill some of the flat spots and blank areas.

First thing was a tow cable, I used the ends off a tow chain attached to some picture hanging wire. You can also pick up jewelry chain for cheap from most craft stores if you prefer a linked chain look.
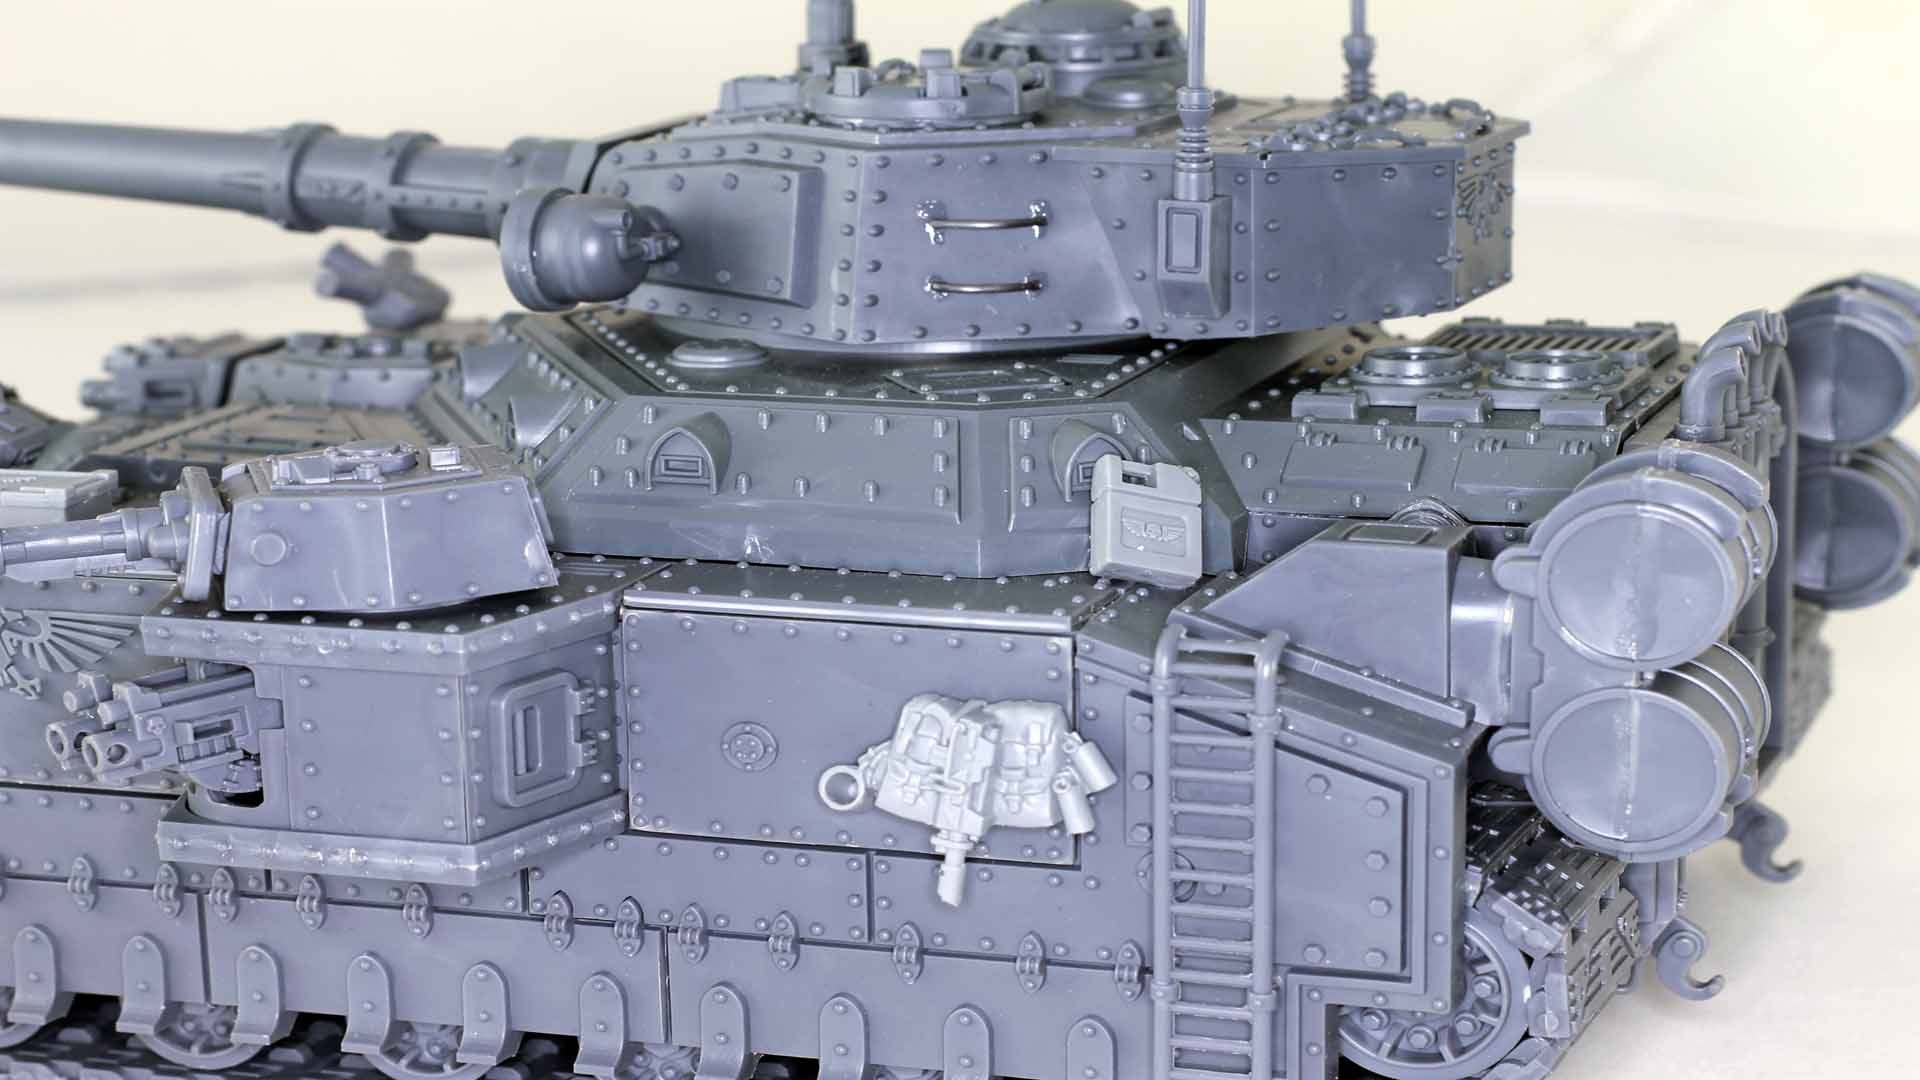
The extra stowage on the side is from an old GW tank accessory sprue, I also took a couple of small wires and bent them to form some extra grab irons on the turret.

I used some flat jewelry strips to form a holder for a spare running wheel on the side, I also have a couple of pieces of etched brass from the forgeworld sets added to the side.

Next steps are to prime and look for areas that need to be filled or leveled.