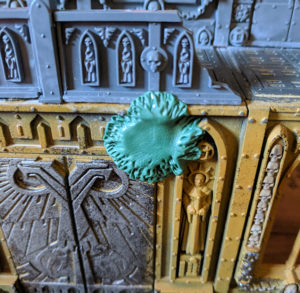
I love building terrain. Be it turning junk into an orkish fortification or assembling an official kit to create an industrial complex of catwalks and boilers. While I have plenty of unpainted miniatures laying around (who doesn’t) lately I’ve been focusing almost entirely on crafting terrain. Which has led to the strange predicament of running out of things to work on. Thankfully, I have friends with their own piles of plastic and so a friend offered to let me build some for him.
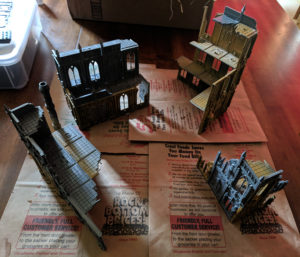 What he handed me was a box of bits and pieces from a number of different old Games Workshop city ruin kits. The sad cast-off remnants of terrain from a local FLGS that shut down, parts were partially painted and of course, there were no instructions. Though, from these disparate bits, I was able to cobble together four ruins of varying sizes.
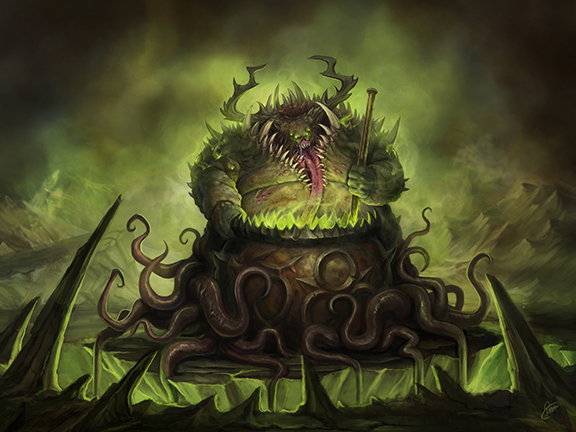
Once built I could have laid down some primer and given the kits a quick paint job before handing them back. My friend, however, plays Nurgle, so I decided I would give the kits a bit more customization. To take them from just ruins into the realm of true decay by the hands of the Plague Lord.
As a bonus, this gave me an excuse to practice my green stuff sculpting.
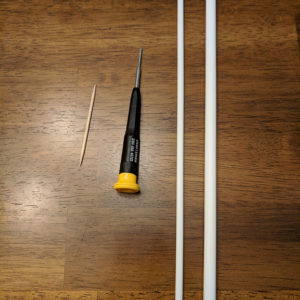 I’m a pretty low tech guy when it comes to my modelling. As such I don’t have any specific tools for the purpose. Instead, to create my Nurgle rot on these pieces I used a toothpick, a small flat head screwdriver, and a pair of different sized pieces of plastic tubing. Admittedly, having actual sculpting tools might have made it easier, but you can accomplish this little project pretty easily with just things found around the house.
Now, for those who have never used Green Stuff, it is a two-part epoxy. One part blue, the other yellow, you cut off pieces of each and then knead them into a green material with a consistency similar to silly putty. More blue results in a firmer less flexible final product, while more yellow will be softer and more rubbery when cured. At this point, you can mold and shape it into whatever you like, but it is important to understand the putty has a working time of around 3-4 hours before it starts to set, and then a total cure time of around 24 hours. The exact timing depends on the exact ratio of blue to green you used to make your putty. I highly recommend keeping some on hand to everyone.
For my purposes I went with equal parts blue and yellow, only mixing small amounts at a time to ensure I had plenty of working time as I chose the spots I wanted to Nurgle and sculpt. Another important thing to keep in mind is that green stuff is extremely sticky until it cures, so I keep a cup of water nearby and actually keep the green stuff I’m using in a shallow dish with a little water.
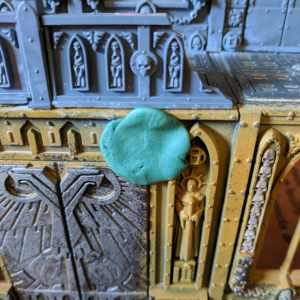 To start the sculpting process I dip my fingers in water and then tear off a chunk of green stuff and place it on the terrain where I want to create the patch of Nurgle rot. You want to ensure you vary the size and shape of these initial blobs to keep the patches from looking too similar. And because the putty is so flexible it is also fun to wrap them around corners and the like. For this example, though we will just look at a relatively circular patch on a flat area of the model.
You do not have to worry too much about smoothing the putty out, just get your general shape and press it against the plastic, pushing it into crevices and the like to ensure it has securely adhered. If the putty is not securely on the plastic to start with you are likely to have issues later with it falling off. This is especially true when you try fancier pieces like those going around corners or over the tops of walls.
Once the basic shape is in place I start by creating the outer rim of the patch using the screwdriver. And really you can do this with pretty anything that has a thin sharp point on it. And of course, more experienced sculptors are more likely to use a pick tool for this purpose. Regardless of what you are using it is important you keep your tools moist throughout the process to avoid sticking. I dip the screwdriver’s tip in the cup of water periodically as I work. Essentially, I just use the blade of the screwdriver to press the edges of the green stuff outward and against the model, creating a pockmarked texture and securing it further against the plastic. To ensure this looks organic I basically do two to three layers of this process, randomly alternating where I press to keep from creating a noticeable pattern. This same technique can also be used to create the illusion of thick fur for the cloaks on Space Wolves or the like.
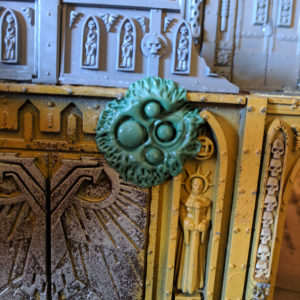 Once you have completed this step you should have a secure patch to work with that looks like its growing off the plastic. You should also have a relatively flat and smooth canvas in the center of this shape into which you can start to sculpt the rest. For this I begin by using the larger of my two tubes, again dipping this tool in the water to prevent sticking and then pressing it into the putty to create large pustules. Now it is very important that you press into the putty directly against the plastic. Otherwise, the putty will simply move with the tubing and you won’t get the desired effect.
This is repeated using the smaller tube in the same manner to make the smaller pustules. Placing them relatively randomly in the space to get an organic look and feel. If you wanted to you could then go back with an even smaller tube to add additional variety, or if you had large patches use a larger tube for bigger pustules. For my purposes, however, two sizes were enough.
 At this point, you could actually use the tip of a screwdriver or blade to pull out the pustules to create the look of craters from bomb blasts or heavy artillery. Carving into the plastic at the center with the same blade or a drill bit would then help complete such look. Since, however, I want the look of Papa Nurgle’s gift growing all over this terrain I have a different next step to complete.
Using the toothpick, or the same pick tool you used for the outer rim, you just go back and pockmark the raised areas of putty around each pustule. I also add some small light marks to the top of each pustules at this point to give them a little more texture. This final step is what really pulls it all together, giving it that final organic look through the use of additional texture.
This is a pretty simple bit of sculpting that I think nearly anyone can accomplish. These same techniques could be used to cover a terrain piece in Tyranid spore pods as well with a few adjustments and a different coat of paint. I am an amateur myself but I am very happy with the results I managed.
Now, I just need to wait for it all to cure so I can begin the painting process and make this thing look really Nurgly. That, however, will be another post.

