Archives

All posts by tentagil

The venerable Drop Pod is an iconic part of the 40k landscape. Slamming into the battlefield, unloading squads of space marines ready to destroy the xeno threat. I assume that after a victory a great ship comes in to scoop them up, clean them up, and ready them for further deployment. But what about when the marines fail, what happens to all those Drop Pods when the battle has been lost.

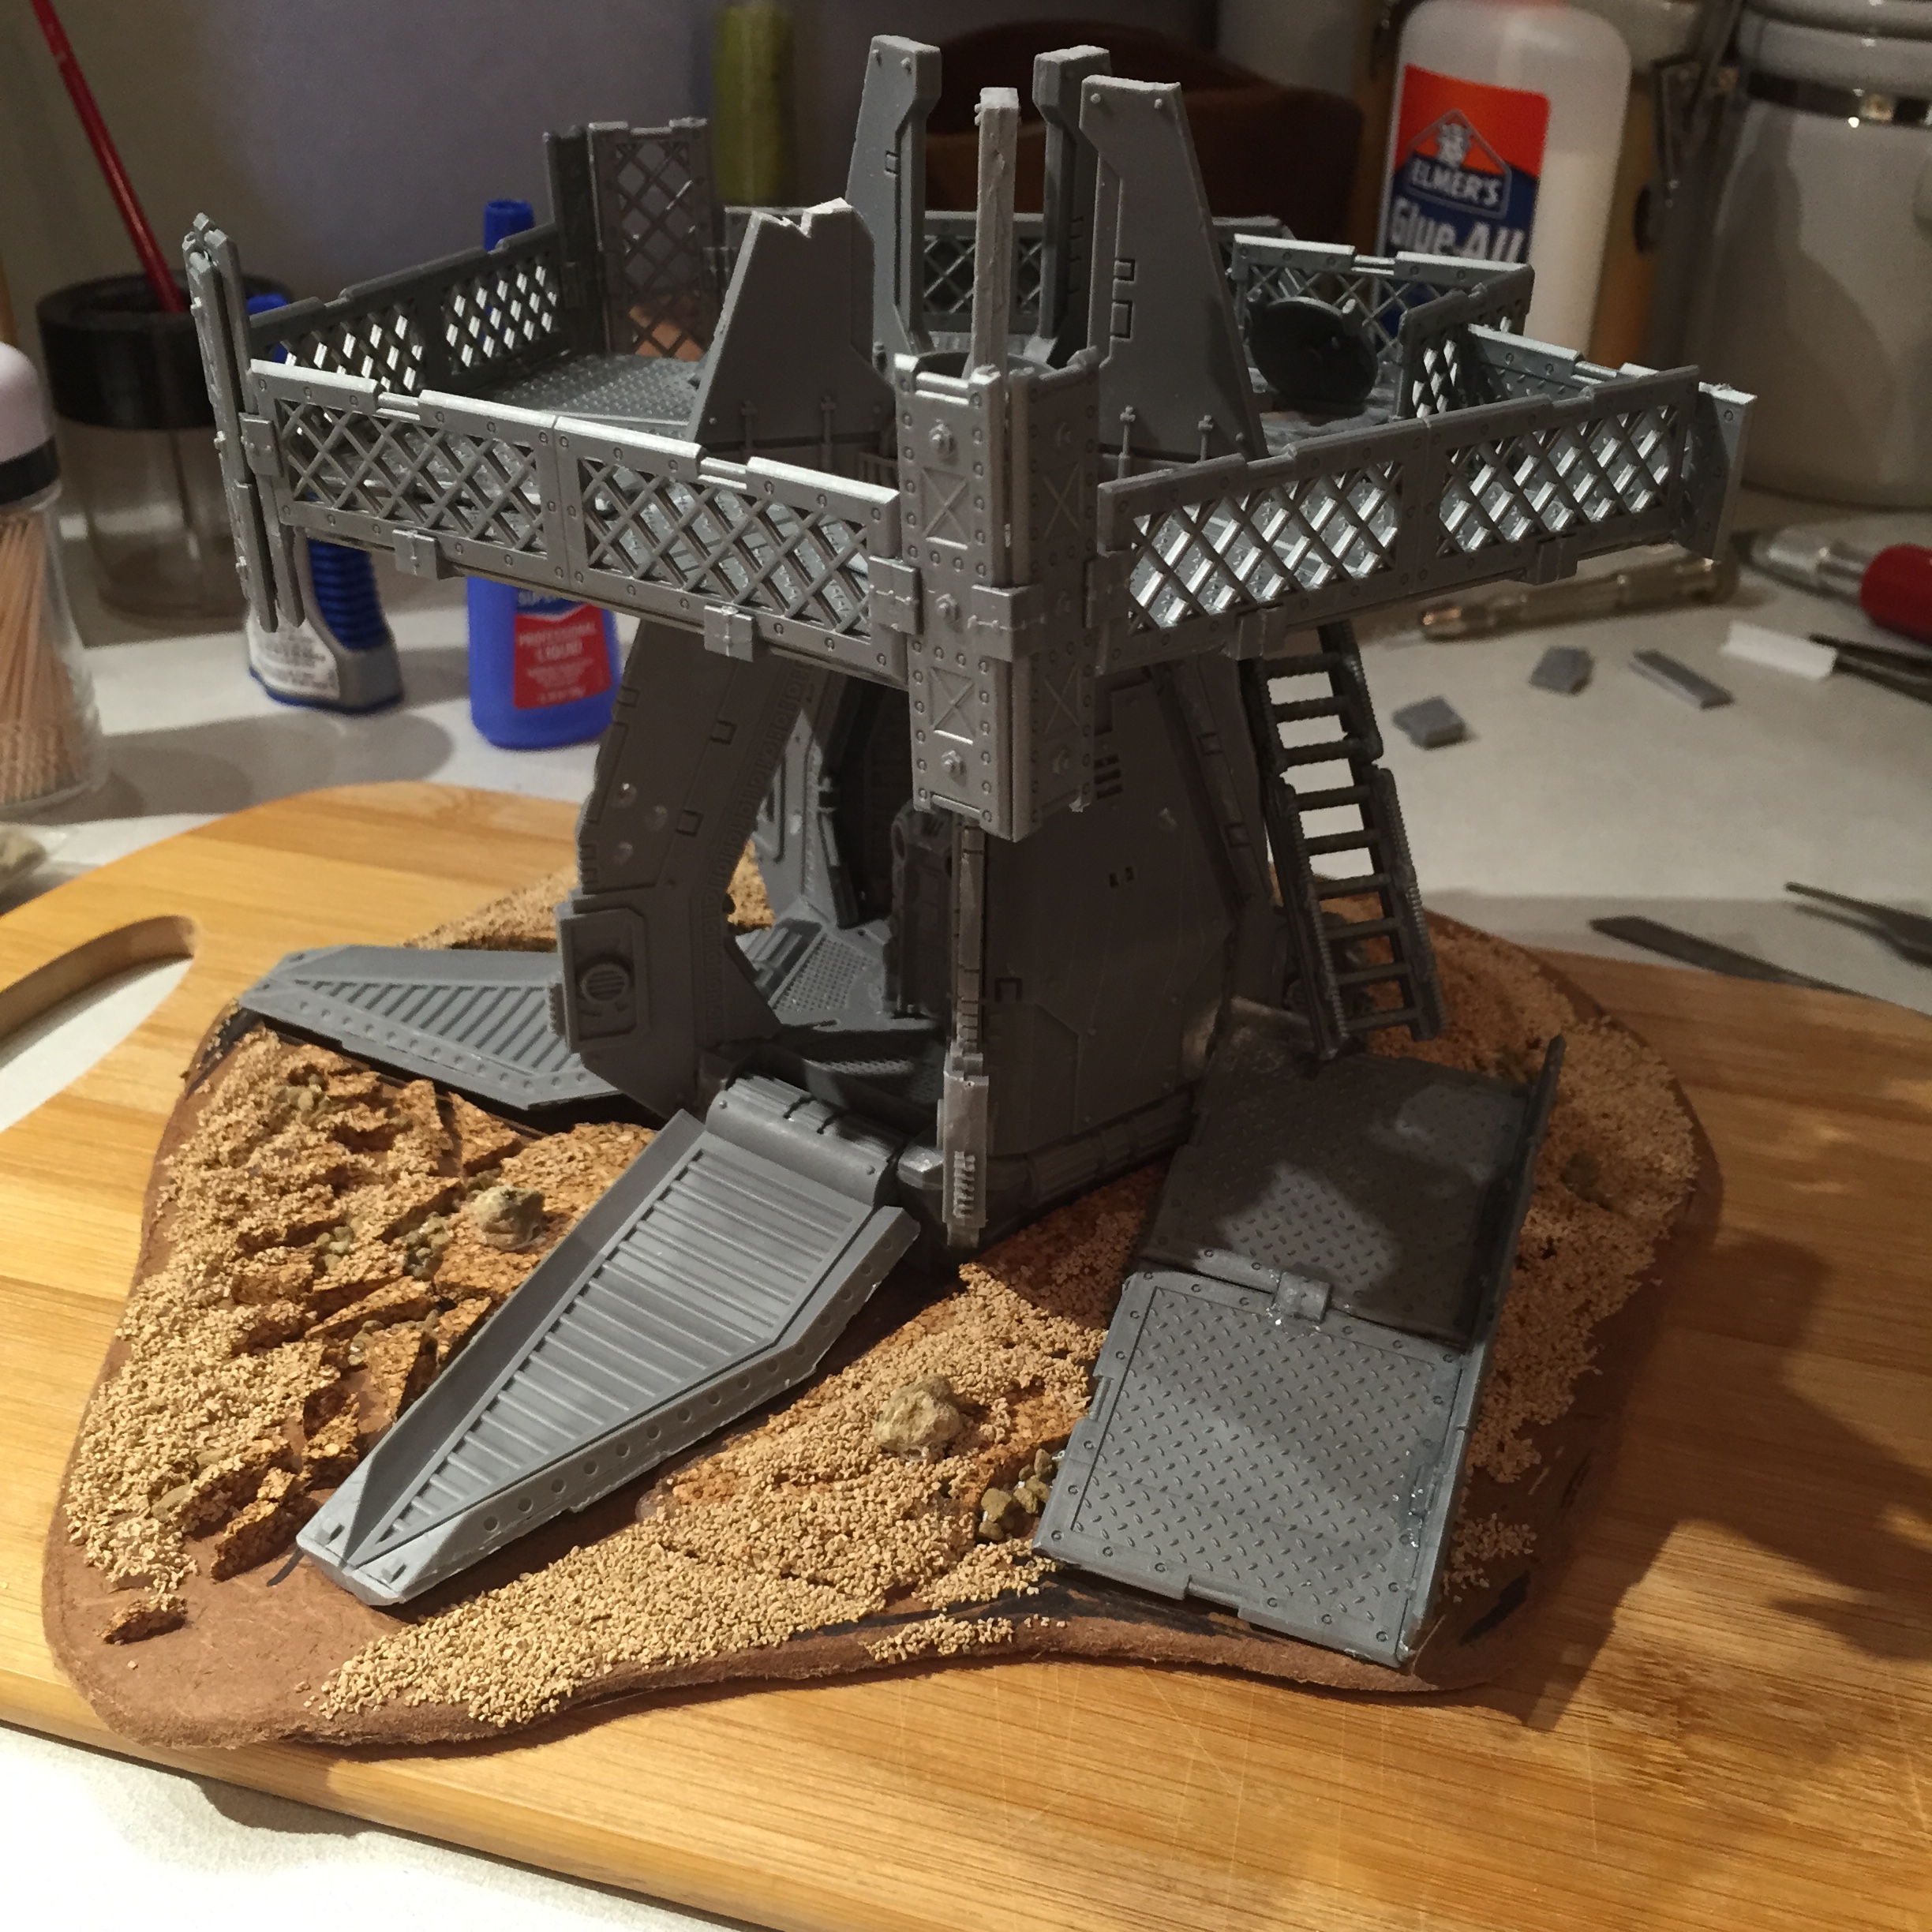
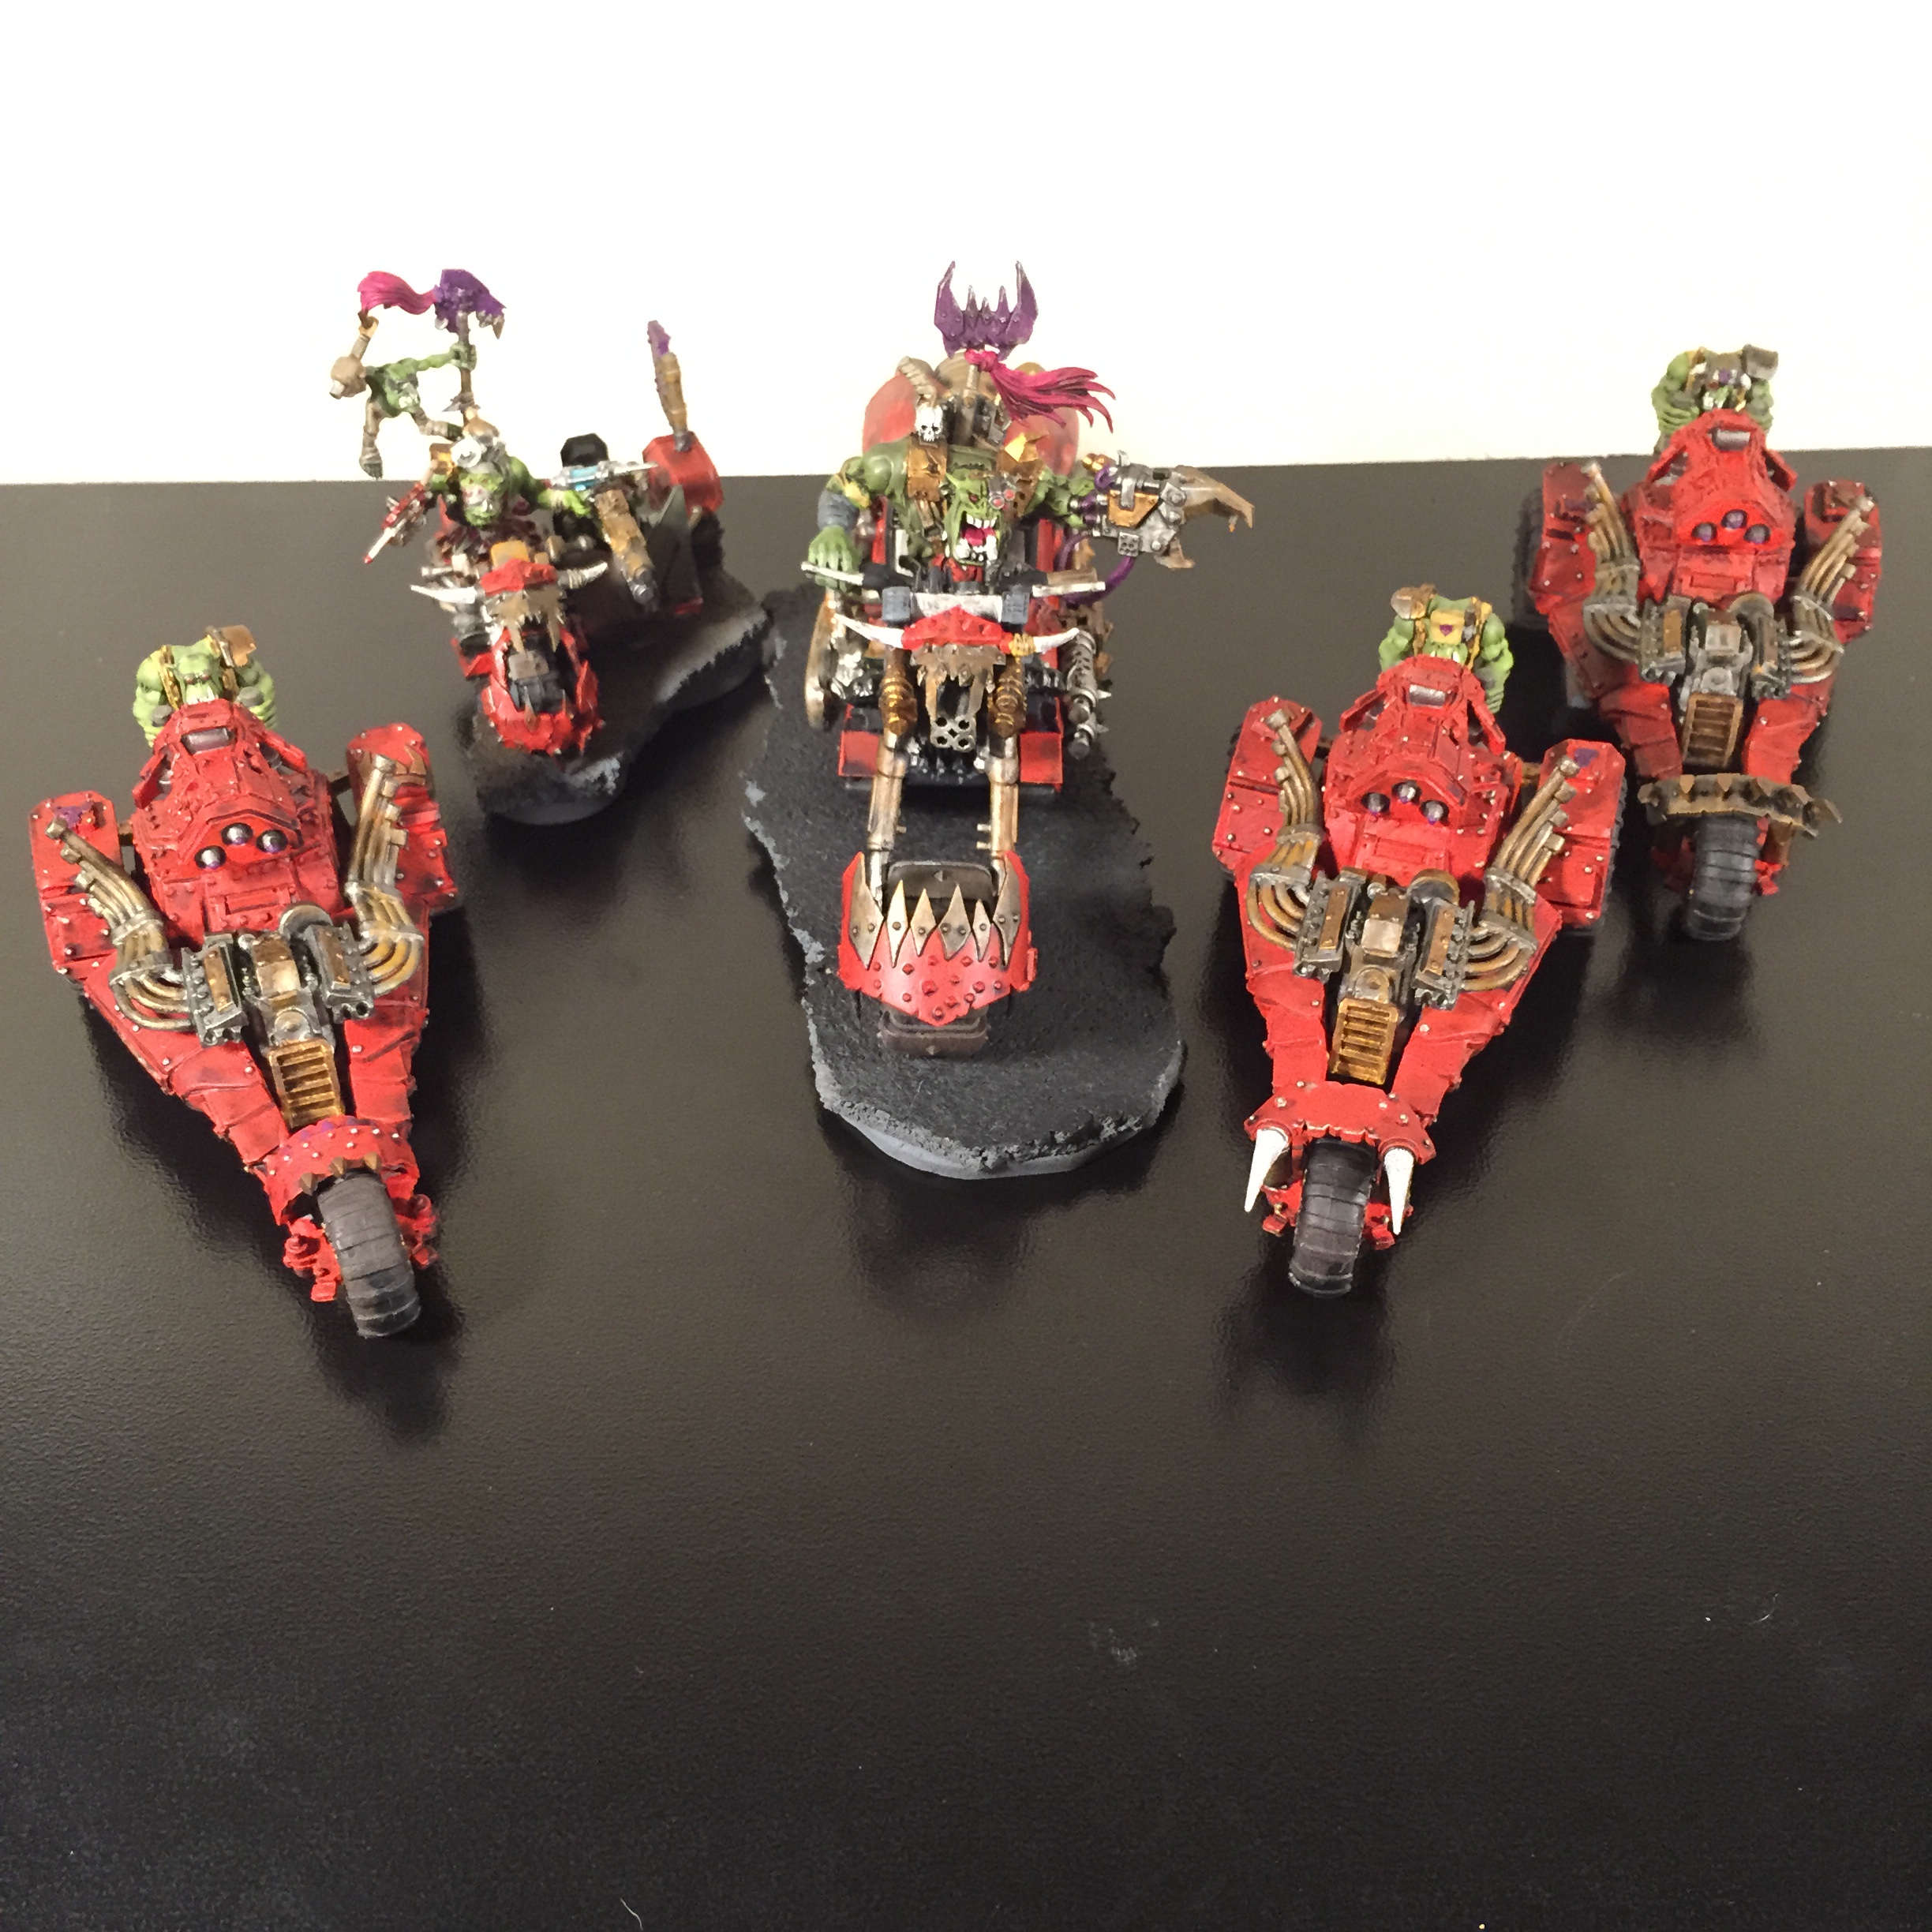
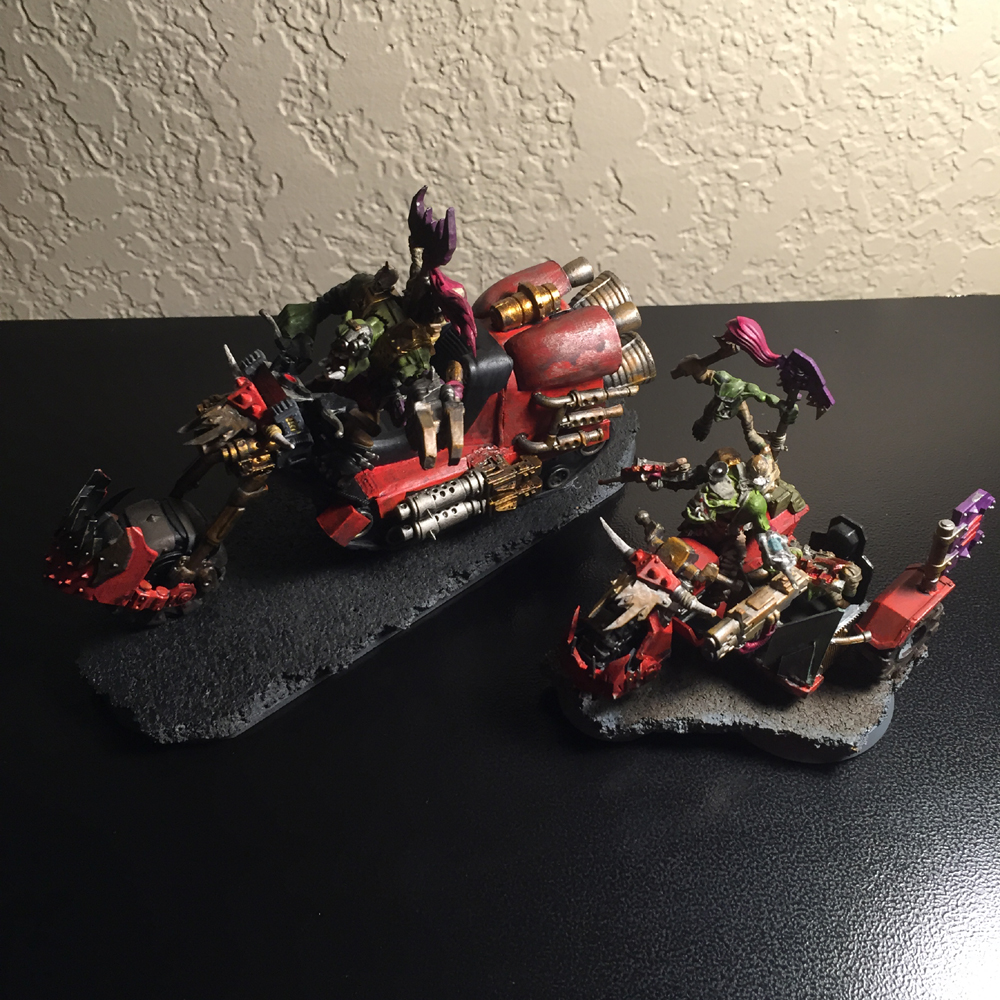
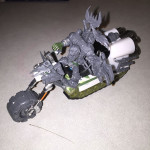
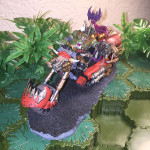
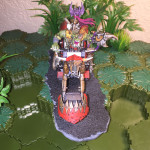
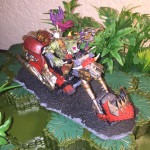
With my great Road Waaagh!!! nearly complete, I’ve started turning my attention towards building some terrain to give the battlefield as much character as the models playing across it. Having enjoyed the Dawn of War games I decided a Waaagh!!! Tower would be a nice place to start. Being that Orks are scavengers, a Drop Pod seemed like a perfect starting point.

1

The kit I used is actually a resin recast. I went that direction partly because using an actual kit seemed a little pricy for this purpose, and partly because the recast was already pitted and damaged which aided my purposes. Of course I went back at it with a drill and xacto knife to give it plenty of battle damage. Once it was assembled, I started adding pieces from the Syberclicks set I reviewed last week to build up the portions I imagined Orks would have built up around the ruined pod.

2

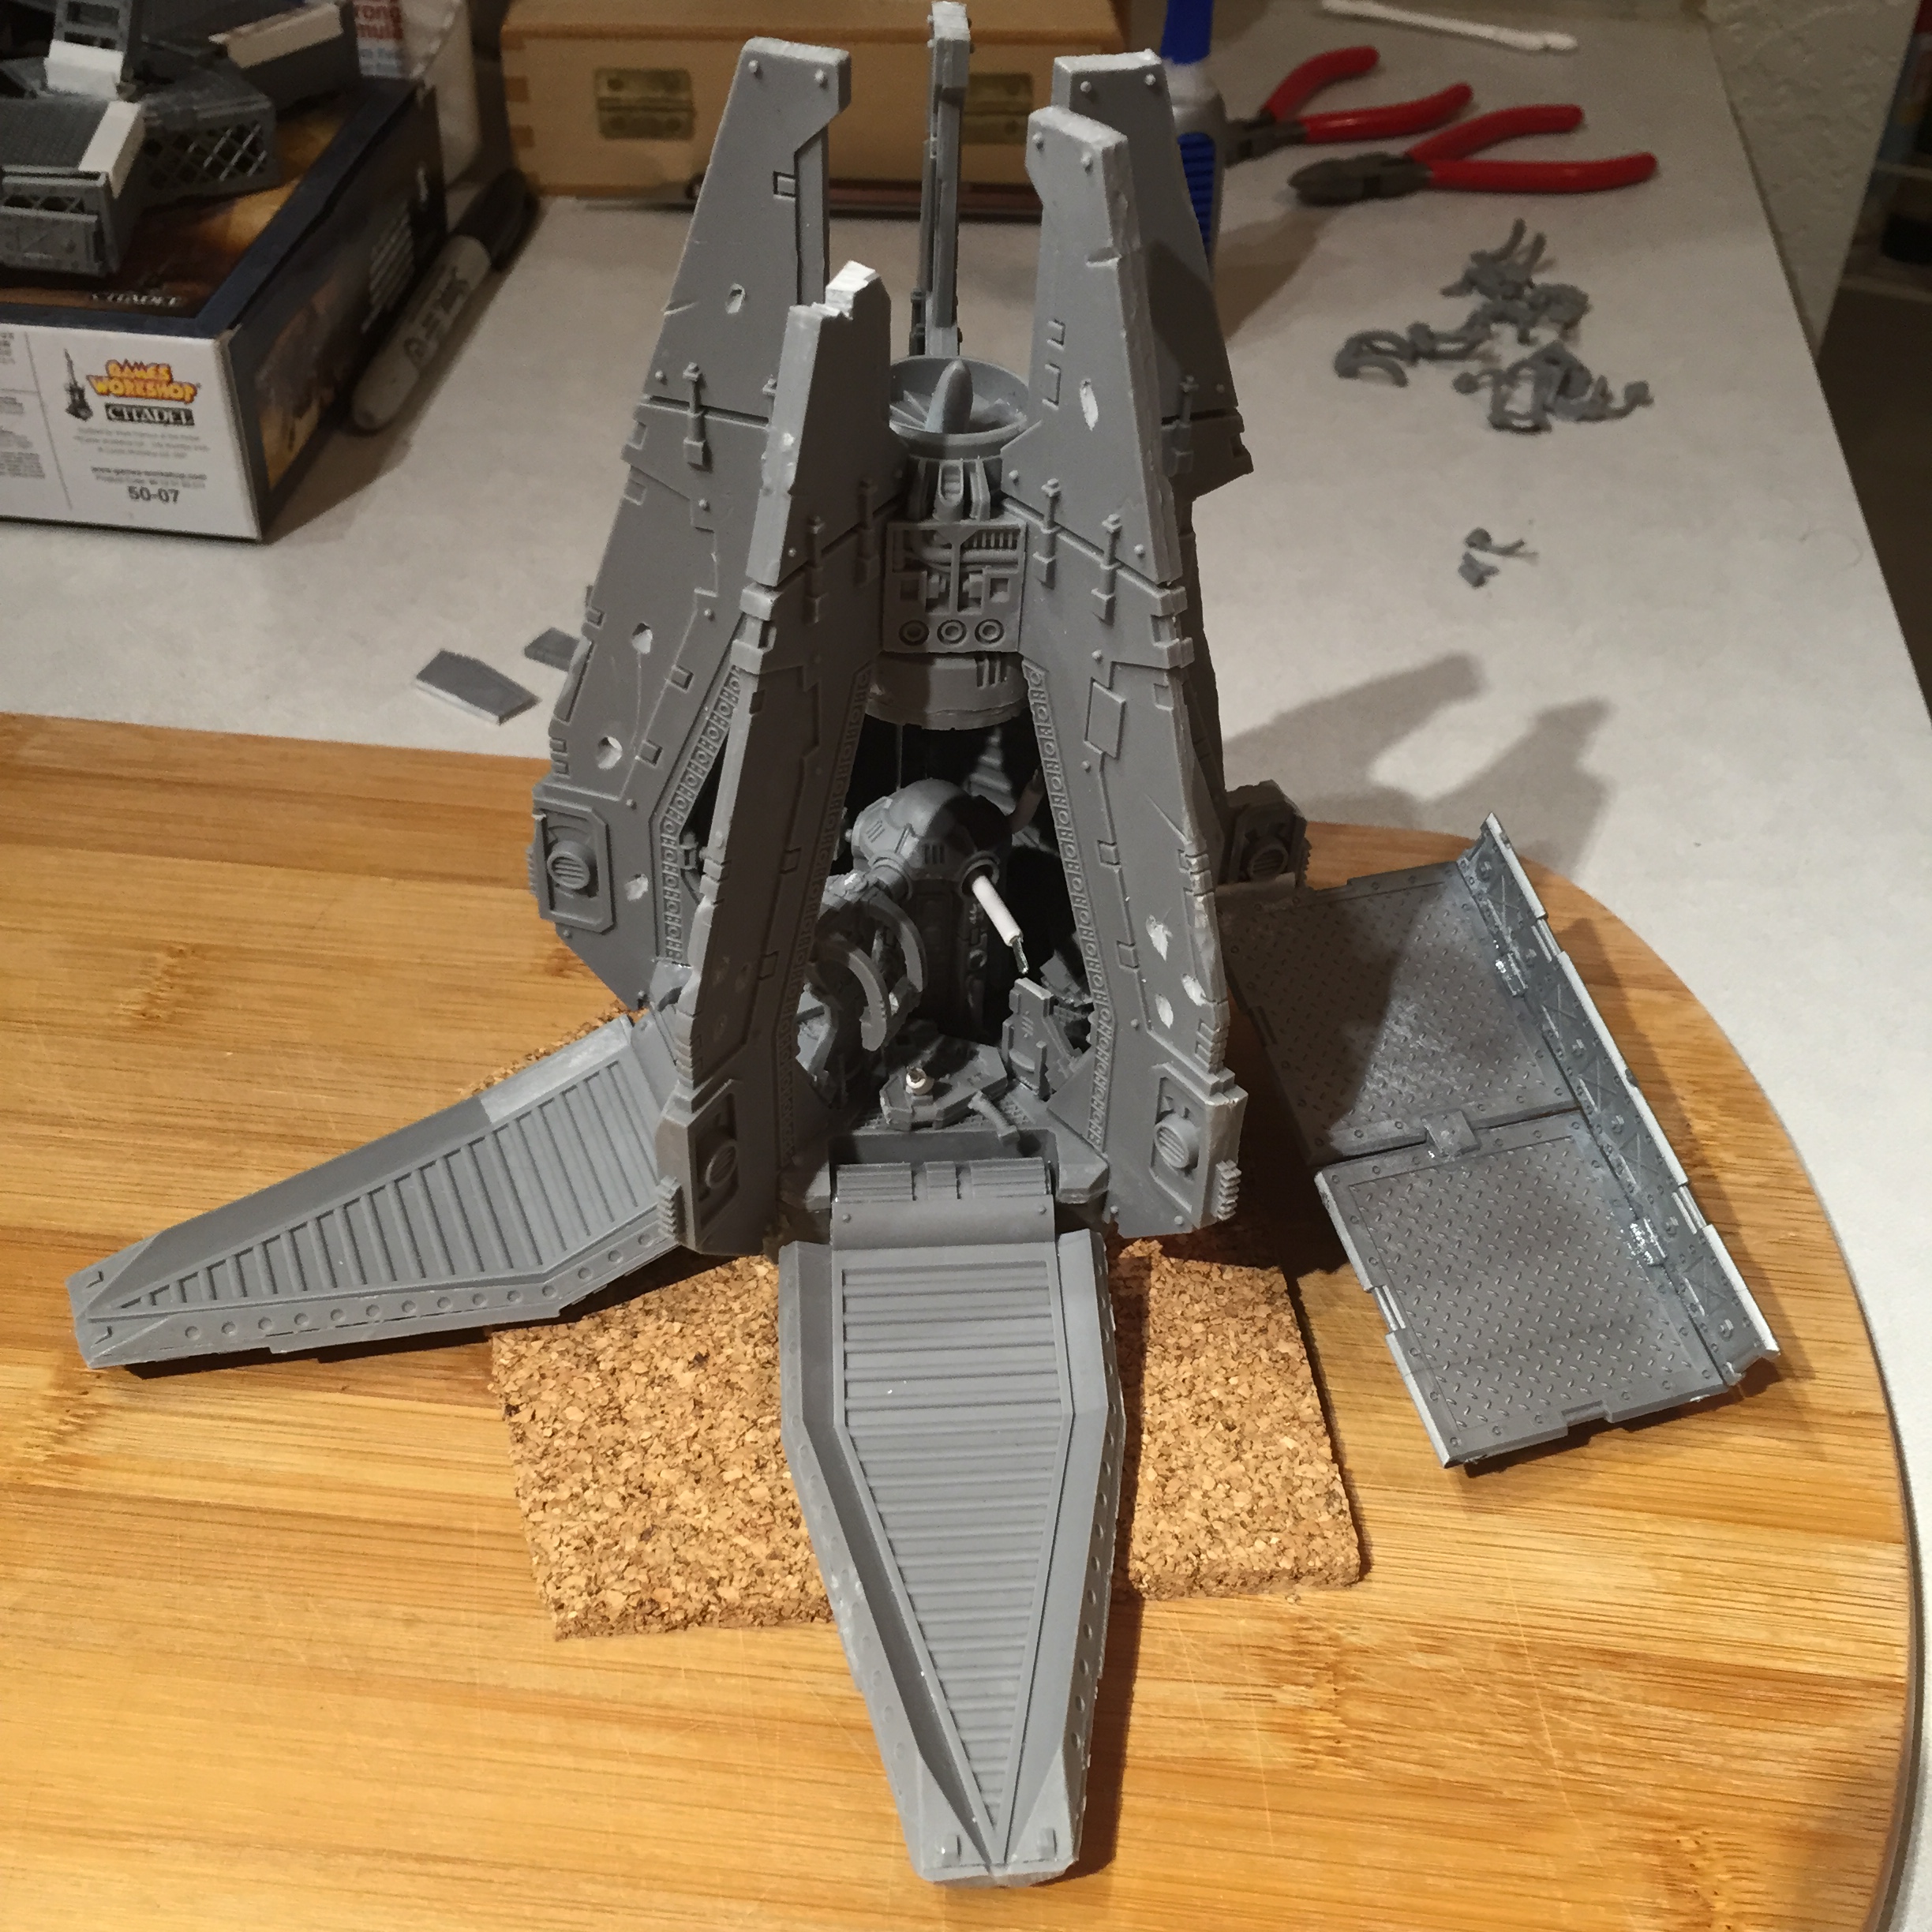
As I mentioned in that review the pieces in the kit look great, but the clips used to keep it all together left a lot to be desired. For this project I used tried and true superglue, and layered the panels to look like they had been peicemealed together. I also went with a variety of different sized panels for the railings to maximize the rambshackle thrown together look.

5

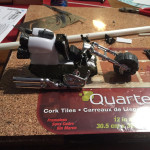
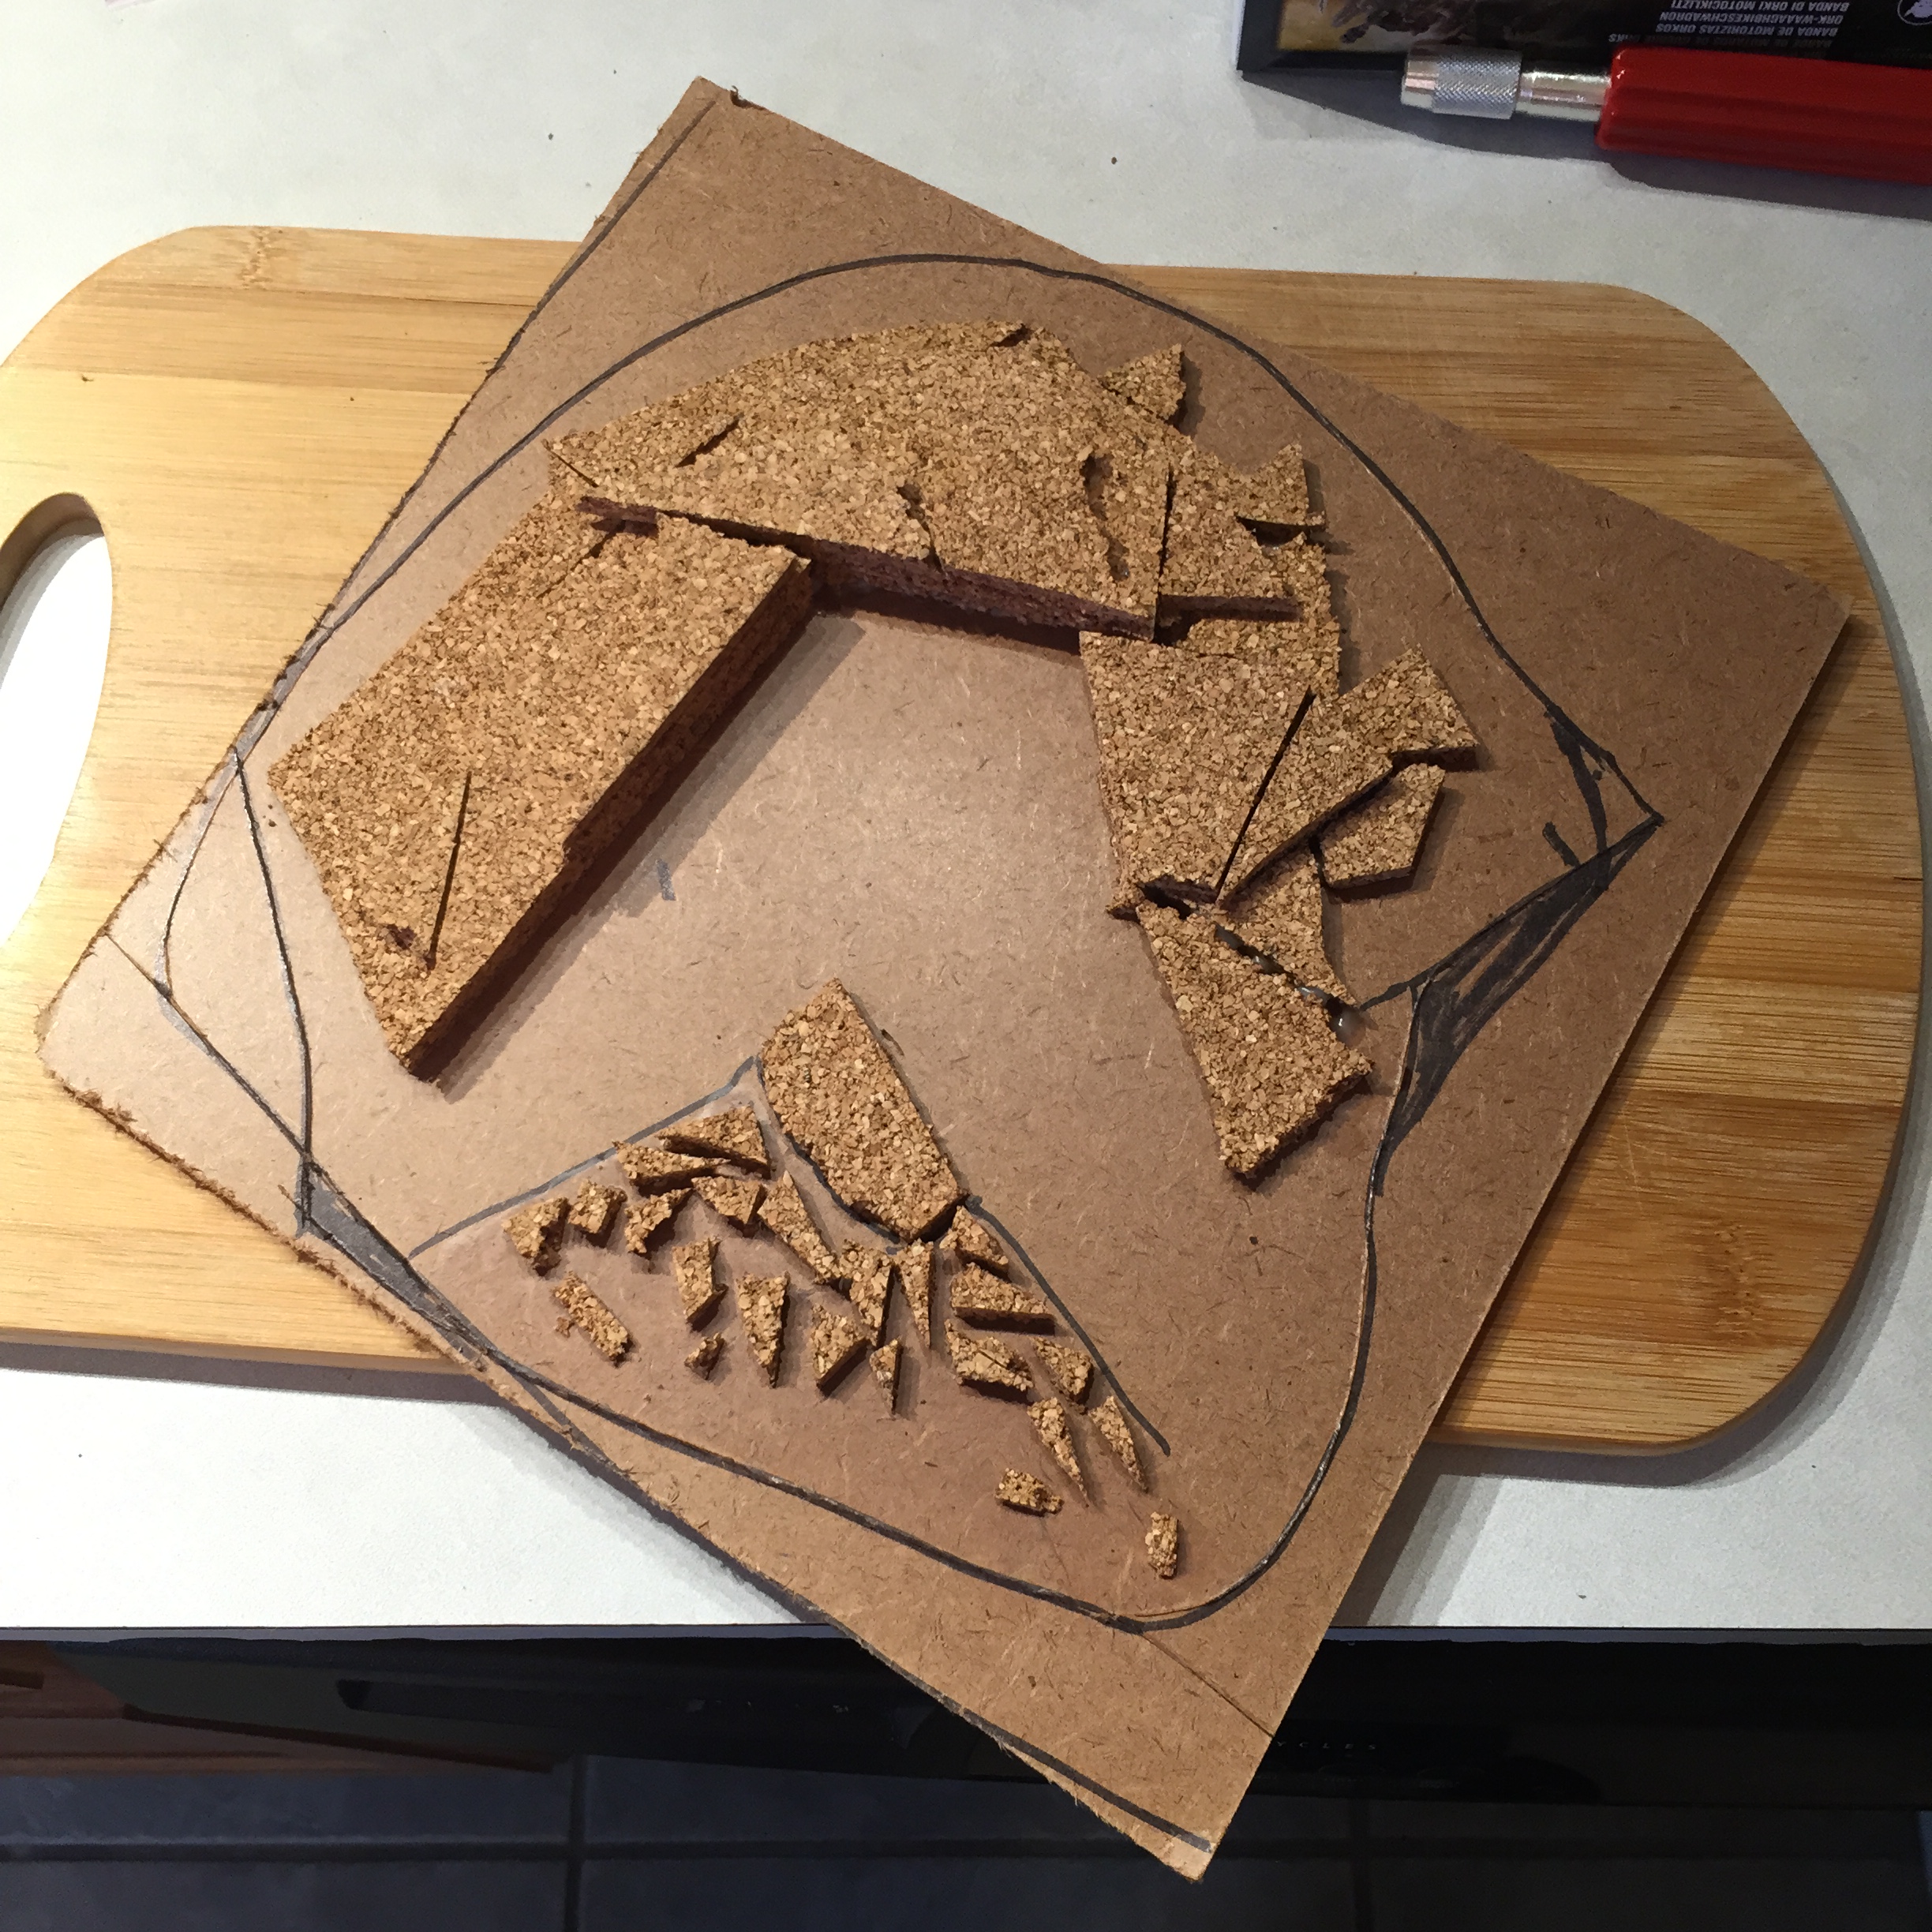
For a base I started with a piece of ten by ten HDF board, it gives a nice sturdy foundation. Then once I had a template for the drop pod traced, I started layering cork board. I wanted to give the look of cracked earth from the Drop Pod initially hitting the battlefield. Hot glue was used to round out some of the edges, and then I hit everything with a sander to smooth things a bit before putting down several layer of different sized sand and gravel.

68

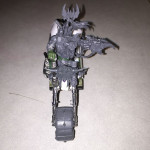
With all of the construction complete I had a pretty decent looking tower. I’ll cover painting it up next time.

9

I am in the middle of another project but I really wanted to keep my one post a week schedule going, so I thought I would give you all a glimpse at an older project of mine. Before I dove into the world of Orks and 40k, I tested the war game waters with Warmachine. Along with my first miniature painting work, this period also saw my first efforts at a terrain project. Since Warmachine tends to only need a handful of dice, I decided to incorporate a dice tower into its construction.

The basic build consisted of a poster tube and parts from a Bachmann Trains O scale water tower kit. Detail elements and the dice tower internals came from plasticard and parts from my bits bin. The final element of any good terrain piece is the base and I built this one before I had really started playing with HDF board. As a result, it is just two layers of corkboard with a piece of plasticard sandwiched between them for structural integrity. This was also necessary to create a watertight seal for another special feature I wanted to try.

watertowerwip

IMG_0600IMG_0609

Inside the water trough/dice catch, I decided to try out water effects for the first time. I went with Woodland Scenics Realistic Water because the reviews pointed towards it creating a very durable surface. I found it to be an easy to use product; you lay down thin 1/8 inch layers of clear resin and give each one roughly 24 hours to cure. I painted the base a light blue to start with and then put down thin streaks of blue ink between layers to give the water a sense of depth and motion.

2015-07-30 17.42.01

Once I was ready to start the actual painting process, I started with a variety of basic browns and metallics from P3 paints. This was also the first project on which I experimented with Citadel’s technical line. In particular, I used Ryza Rust, Typhus Corrosion, and Nihilakh Oxide all too excellent effect in giving the tower a weathered and worn look. I was especially proud of the oxidized effect on the bronze roof.

IMG_0624IMG_0622

There was a lot of experimentation involved on this project and I learned a lot from it.  Never be afraid to try new techniques.

I recently picked up the Pegasus Hobbies Syberclicks modular terrain kit to use in a project. It’s an interesting kit designed to allow you to build a variety scifi style buildings using snap together construction. Theoretically, that should result in a versatile set of parts that you can quickly build terrain with, and change the designs anytime you like. In practice, it does not work quite as well as advertised.

The set consists of six identical sprues of molded metallic grey plastic. The set consists of a variety of steel panels, grates, ladders, hatches, and some gothic windows. Everything is laid out so all the parts can be clipped and assembled with minimal cleanup. There are very few mold lines and the parts all have excellent details. Everything feels solid and looks great on the sprue.

2015-07-17 17.35.01

Continue Reading

I reviewed the Mantic Marauder Raptor a few weeks back and mentioned that I would be converting them to serve as my Ork Warbuggies.  Having gotten them assembled I went right to work on the converting process.  I ended up going with only a few minor changes as I found the Raptors to be very close to the look I already wanted.  Mantic’s models do not have quite the same level of detail as Games Workshop’s releases, but I they get some points for the cooler buggy design.

I did have to replace the gunners of course, as mentioned in the review they were a tad small and oddly posed.  As a replacement, the Ork Gunner model from the Games Workshop Gorkanaut was damn near perfect for my purposes.  Thankfully, I recently picked up a few sprues of them in a bits lot.  I added some shoulder armor from the Ork Nob sprue to make them look a little tougher and they fit the buggies as if they were made for them.

2015-07-05 09.20.432015-07-05 09.21.26

For the Warbuggies themselves I fashioned unique front fender armor for each from Killa Kan bits and then decorated them with Ork Glyphs from the Trukk kit.  Almost every Ork kit comes with extra decorative bits, and half the fun is finding unique ways to use them.  The end result were Warbuggies that fit all my Orky needs, ramshackle vehicles that still looked like they could move fast and spit out plenty of dakka.  I was tempted to magnetize the weapon so I could swap in Big Shootas, but honestly I plan to run these guys primarily as tank hunters so ended up just gluing the rockets in place.

2015-07-02 20.34.00

I also added a base to each of them using a bit of metal tubing and some square 40mm Warhammer Fantasy bases.  This was to add some stability on the table and so that I could magnetize them for transport as I use metal trays.  The squares were positioned so that unless you are looking for them they are pretty much invisible beneath the rear of the buggies.

2015-07-05 09.22.43

For color scheme, I followed the same palette I have used on my other customs so far.   I put a red base over most of the vehicle, and then a mix of gunmetal, silver, copper, and brass on the various metallic parts.  I picked out various bolts and panel edges to give it a scratched up look, dry brushed Ryza Rust over the gunmetal, then washed it all in nul oil.  Then I hit the tires and under carriage, including the base, with typhus corrosion for a textured mud covered look.  I also picked out one sigil on each to hit with purple as I have made that something of a unifying element with this force.

2015-07-08 22.41.22

While they all look great together, here are a series with a closer look at each.  Followed by a group shot with my Warboss and Painboy.  So far this Road Waaagh!!! is coming together nicely.

2015-07-08 22.41.39 2015-07-08 22.41.55 2015-07-08 22.42.07 2015-07-08 22.42.20 2015-07-08 22.42.31 2015-07-08 22.42.41 2015-07-08 22.45.18 2015-07-08 22.47.33

If you are going to run Orks, you need someone to patch up your boyz when they inevitably get shot up by the enemy. Thankfully, there are Painboyz with their ‘Urty Syringes, collection of rusty Doc Tools, and pack of Grot Orderlies running around ready to reattach an arm here, replace a leg there, maybe add a rocket launcha just for kicks. Naturally, I needed one in my army, and since I’m going for speed he was going to need bike.

There is a fairly cool looking plastic Painboy model available now, but for this project I decided to go with the older design which is still available in Finecast from the Games Workshop website. This was my first experience with Finecast and I am kind of hoping it will be my last. It is a very fragile material, which makes it easy to cut up for modifications, but also means that pieces break off at the slightest pressure.  I spent more time trying to get the doc to stay together then I did building his custom bike.

1

For that custom bike I needed a suitable base. I could have just used an Ork Warbiker, but since the Painboy model came with a Grot, I figured it would be nice to have a sidecar so he could ride shotgun and keep the docs tray of pointing doc tools at the ready. Thankfully, Games Workshop just happens to have a Space Marine bike that was perfect for my purposes. It was going to need a bit of work to fit the Ork aesthetic however, far to shiny and new looking.

A Warbiker kit gave me all the parts I needed to properly customize the bike, and I was able to cut up the Painboy and se the Marine biker’s legs to fit the ork right proper in his seat. Some plasticard added some much needed extra armor to the side car and I was ready to prime.

354

I followed essentially the same paint scheme I have used on my previous Ork custom projects. Plenty of red to make it go fast and then assorted metalics with some rust and black wash to give it that beat up look I think an Ork vehicle needs. These are rugged well used machines after all. One thing that might be noticeable is that I decided to give the Blood for the Blood God technical paint a try. I figured a Painboy was likely to spend most of his time covered in blood from all his surgeries, and I really like the effect it gives.

678

One final shot to give some scale. That and I just really like showing off my Warboss. So far my little Kult of Speed is coming together pretty well. I hope to have my trio of custom warbuggies and a bunch of bikes ready in the next few weeks to give me a solid start to this army.

9

Something a little different this week as I take a break from constructing Orky contraptions and give a little review of a non GW model kit I think would do well in any Ork force.

Games Workshop has some beautiful models; however, some of their kits are in need of a major upgrade.  The Ork Warbggy is one such kit; its design is still circa the late 90s, and it doesn’t really fit the modern aesthetic of the rest of the Ork models.  The biggest problem is really the Ork driver and gunner, which one could replace easily enough with modern figures.

4

Continue Reading

One of the things that appeals to me about the Orks is the very ramshackle Mad Max style they have to their vehicles.  The whole thrown together from whatever junk they could find and random armor plates bolted on all over the place aesthetic really calls to me.  That being said I’m not a huge fan of a lot of the actual Ork vehicle models available from Games Workshop.  In the case of the Trukk in particular the issue isn’t the styling, which I love, but the size.  The Ork Trukk is a rather rinky dink little vehicle, which is really a problem across all 40k factions.  I know true scale vehicles would be massive and take up way to much room on the table.  Still I wanted a bigger Trukk for my hoard so I decided that like any good Ork player the best option would be to build my own.

I started with the official kit, because despite its diminutive size its full of amazing detail and bits that would help me bring my project life.  Then I paired that with a ten-dollar snap kit Humvee model I picked up in the local toy aisle.  Throw in a sheet or two of plasticard to hack into extra armor plates and I had all the ingredients to build da right proper Trukk.

1

I hacked up the model, tearing off the roof and punching some holes for the engine and exhaust to stick through, then started armoring it up with bits from the Trukk kit and pieces of plasticard.  I wanted as many of upgrade options as possible to find their way onto the finished model.  The boarding planks drop down off the back to give the charging passengers that precious extra inch.  The wrecking ball hangs from the side for those surprise Trukk assaults, and we have the reinforced ram up front for when I want to tank shock.  I don’t know that I’ll always use all those options, but it’s nice to be able to point them out when I am.

432

As a personal touch I through a unique hood ornament up front.  It’s not 40k without skulls, and I just find the Necrons so much more interesting with dapper hats.  The hats are available on Shapeways by the way and will likely end on more of my projects in the future.

6

To finish it all off I made sure to paint it red and then a lot of metallic bases and then dry brushed for rust and tarnish and everything washed in black for that grimy oily look I think all Orks should have.  The finished model came out even better than I had hoped.

78

To give an idea of scale, my Trukk is 2 ½ inches longer and a ½ inch wider than the official model, while having the same height.  It can fit 12 boyz in the passenger section, though still a little tight it is far better than the GW version in that respect.  It is also just a little bit bigger then my Biker Warboss, though I think the two look rather epic beside each other.  Until next time ladies and gents keep bashing and building.  It is the right proper Ork way.

910

I have recently found myself pulled into the world of 40K thanks to a group of friends and an escalation league at my friendly local game shop. While new to the game, I have been kitbashing and modeling for years, so of course I had to pick the faction where that sort of thing is not just acceptable, but damn near mandatory. Thus I find myself waging into the great green tide of the WAAAGH!!!

As a fresh new Ork player I almost immediately became enamored with the Kult of Speed and decided rather quickly that I needed a hoard of war bikers. Unfortunately, the only official Ork Bikerboss model made is a rather expensive Forgeworld figure. While very cool, he exists just out of my acceptable price range for a single model. So lacking a sufficiently imposing and badass looking figure, I decided to make my own.

A quick trip to the toy aisle and a local model shop produced a nice stack of parts fodder and a few sheets of plasticard. Breaking down a tank gave me tracks for the rear end; while the back end from space shuttle model kit supplied the power plant and thrusters, and a motorcycle model gave me appropriate exhaust pipes, handlebars, and the front forks. Then I started adding plasticard, and all of those disparate parts gave me a decent initial mock-up.

To flesh out the bare frame I’d put together from those various toys, I pulled several bits from an Ork Trukk, specifically a wheel, several fuel tanks, some more exhaust pipes, and the front grill. An Ork Warbike provided the front cowl, and a Deff Dread faceplate served as a front fender while its shootas got side mounted to become the Dakkaguns. As for the boss himself, I cut-up and reposed the Assault on Black Reach Warboss. A fair bit more plasticard and plenty of greenstuff later I had a damn good-looking figure ready for priming and paint. A few work in progress pics provide and idea of the direction I was going, though I wish I’d taken a few more.

Naturally, I had to go with a red paint job because Da red wunz go fasta! I used plenty of metallic pigments to pick out all the dakka festooned upon the rig, and then I grimed it up with dry brushed rust and a good black wash. I used a mix of citadel and P3 paints on the big guy and did a very simple cork board basing on top of a custom base plate cut from some 3.2mm thick sheet styrene.

Being the customizer I am I plan on building up plenty more ramshackle Ork vehicles in the future. Hopefully I’ll have the peace of mind to take more work in progress pictures to really show off the process.